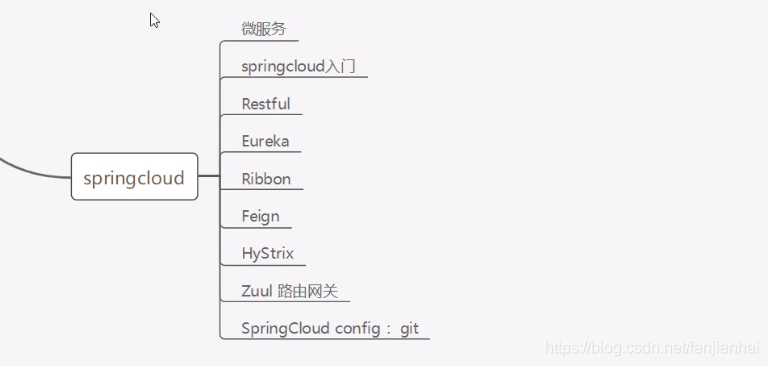
1. 微服务阶段
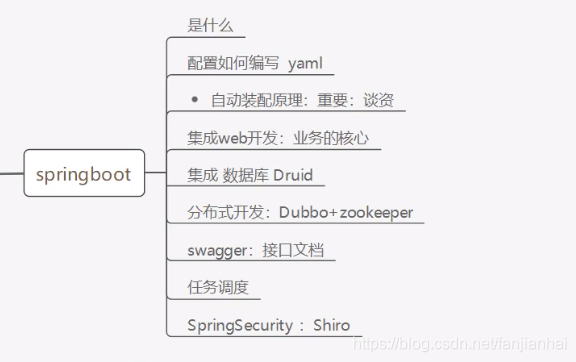
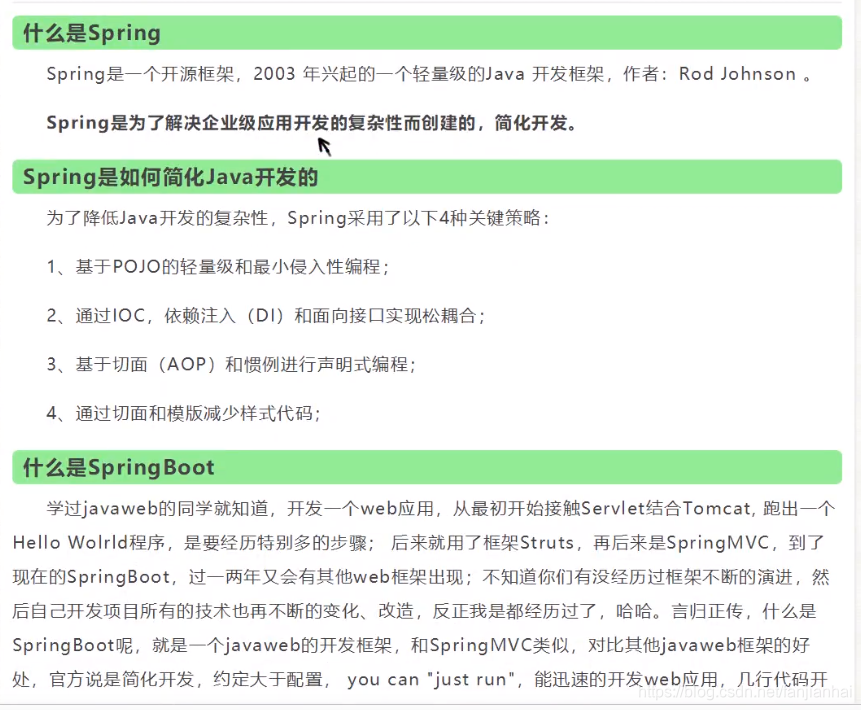
2. 什么是SpringBoot
3. 微服务

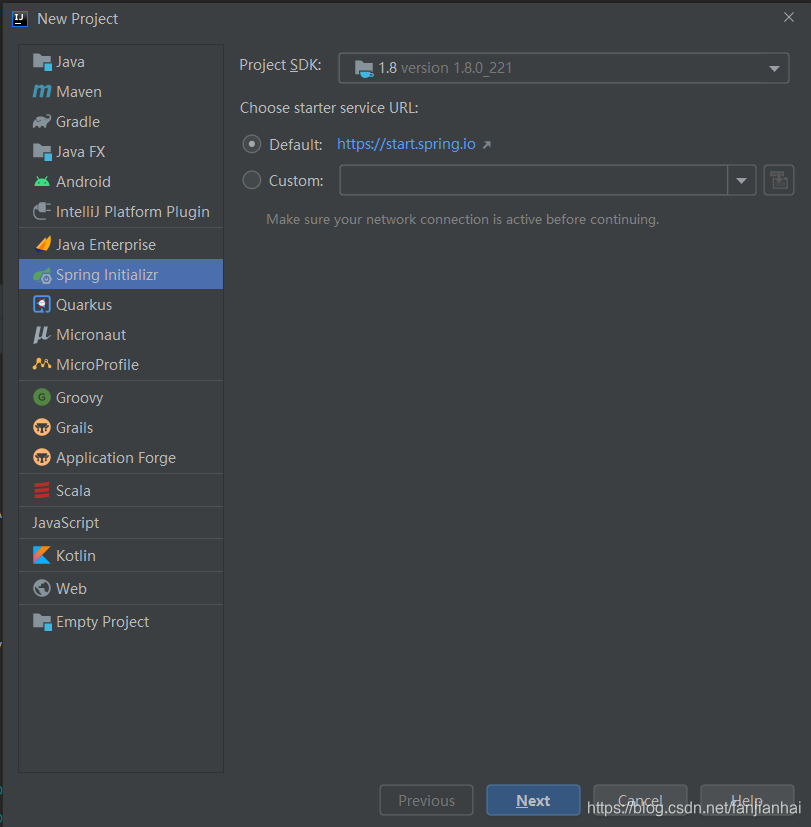
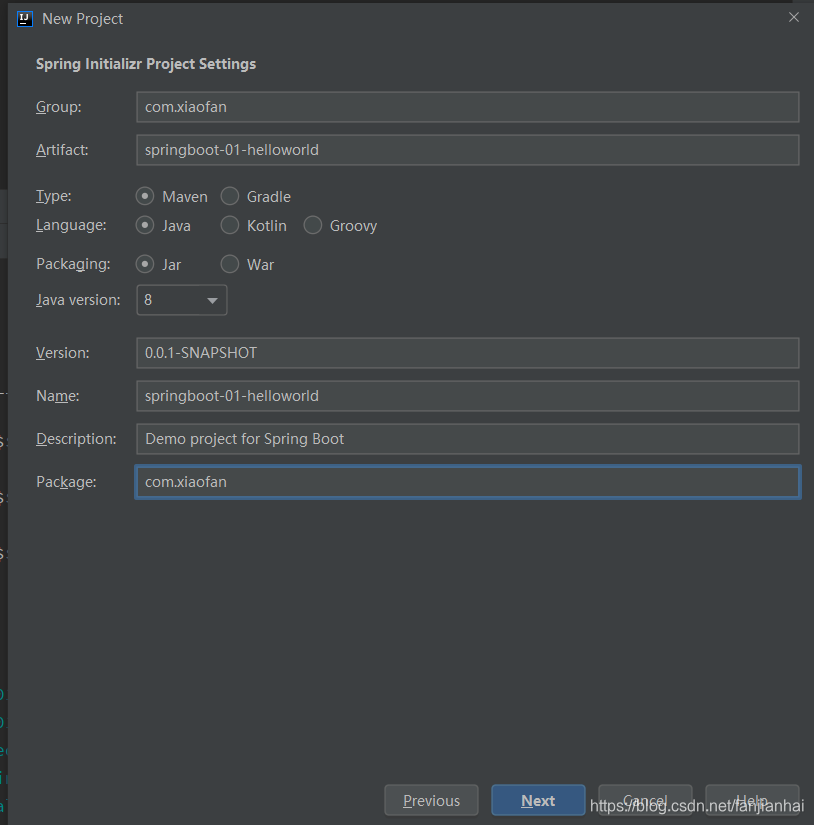
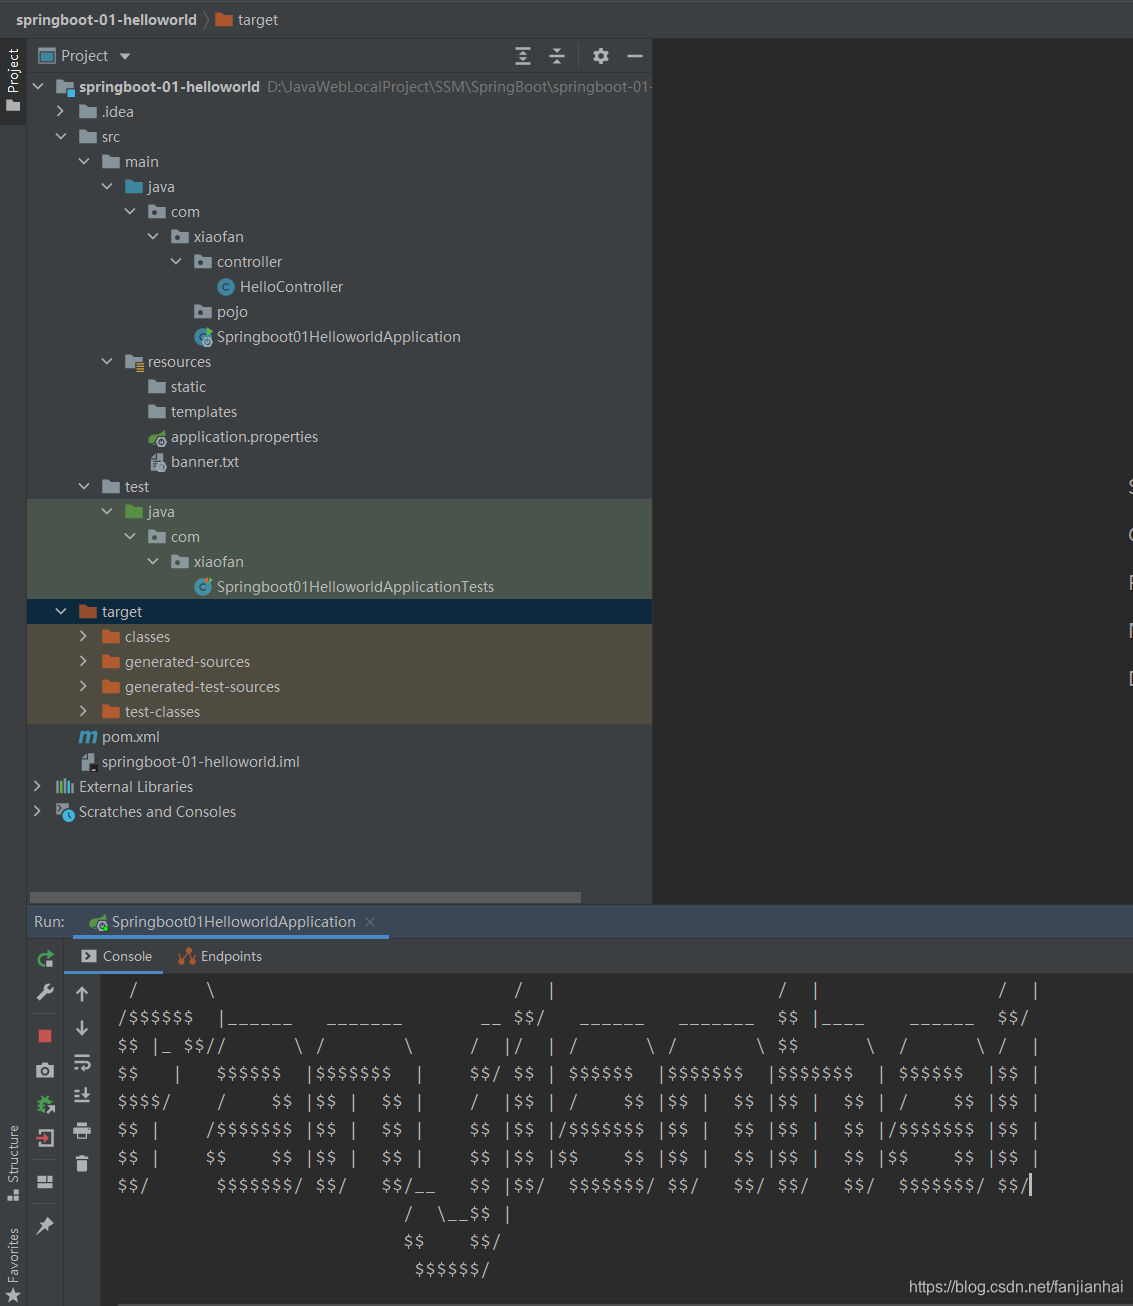
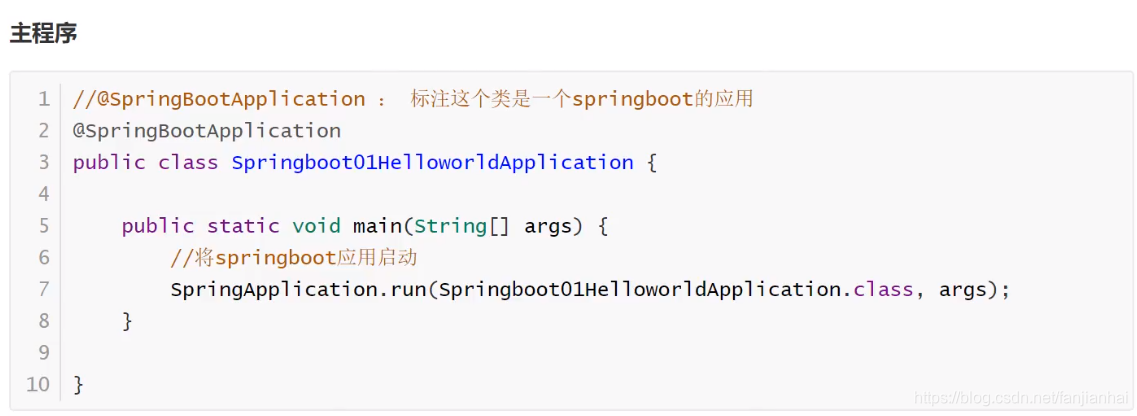
4. 第一个springboot项目搭建 springboot-01-helloworld

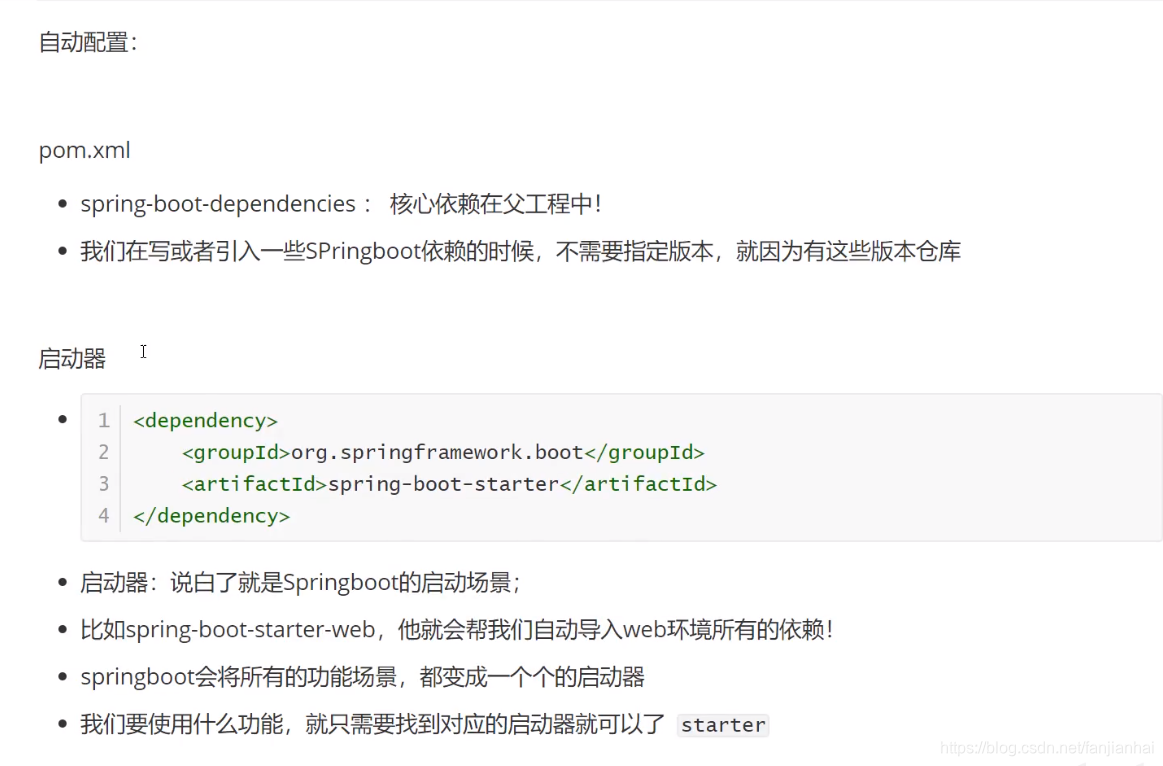
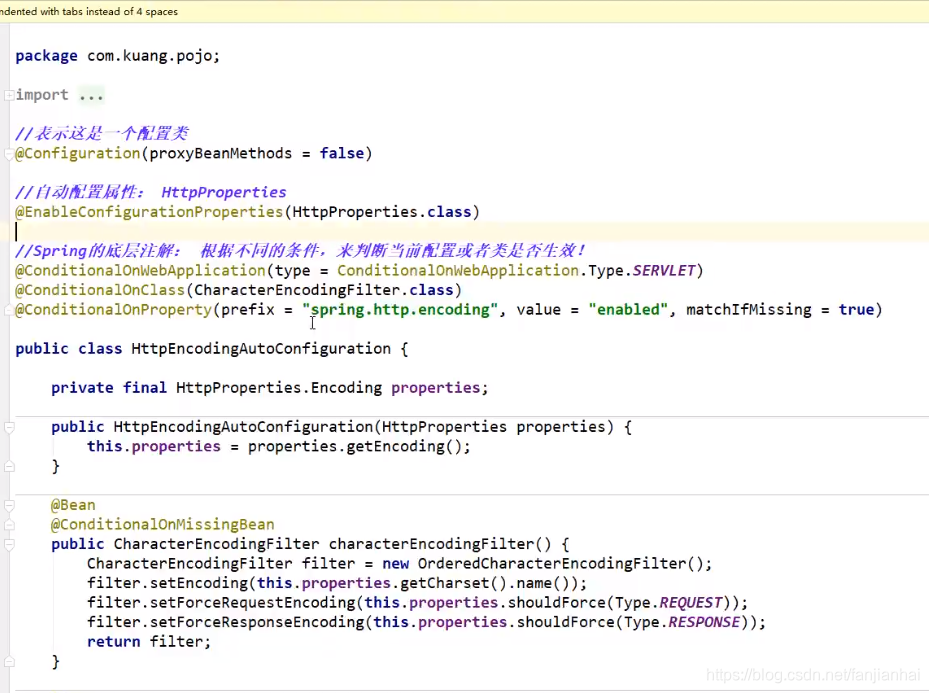
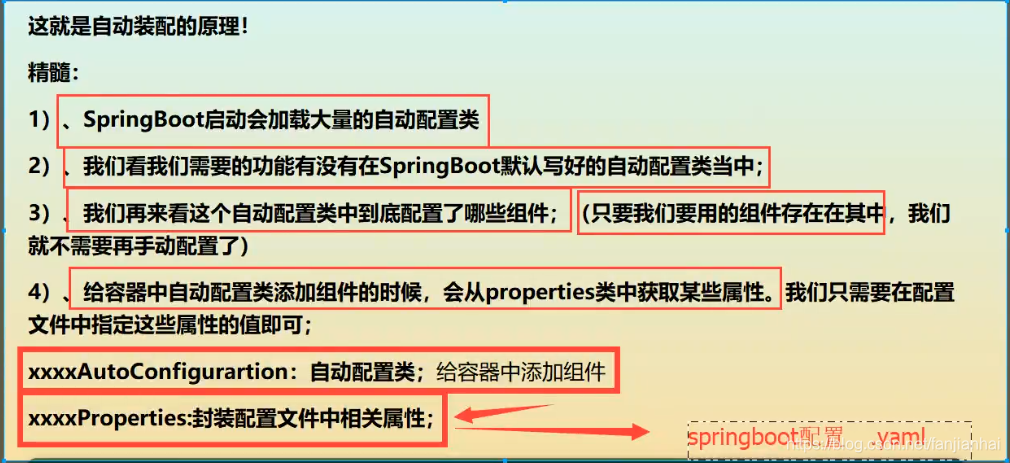
5. SpringBoot自动装配原理
5.1. 自动装配原理分析
@SpringBootApplication
@SpringBootConfiguration
- @Configuration
- @Component
- @Configuration
@EnableAutoConfiguration 自动导入包
@AutoConfigurationPackage 将 添加该注解的类所在的package 作为 自动配置package 进行管理
- @Import({Registrar.class})
@Import({AutoConfigurationImportSelector.class}) 自动导入包的核心
- getAutoConfigurationEntry(annotationMetadata); 获取自动装配的实体
getCandidateConfigurations(annotationMetadata, attributes); 获取候选的配置
- protected Class<?> getSpringFactoriesLoaderFactoryClass() {
return EnableAutoConfiguration.class; } 标注了EnableAutoConfiguration注解的类- public static List loadFactoryNames(): 获取所有的加载配置
- protected Class<?> getSpringFactoriesLoaderFactoryClass() {
loadFactories() loadSpringFactories()
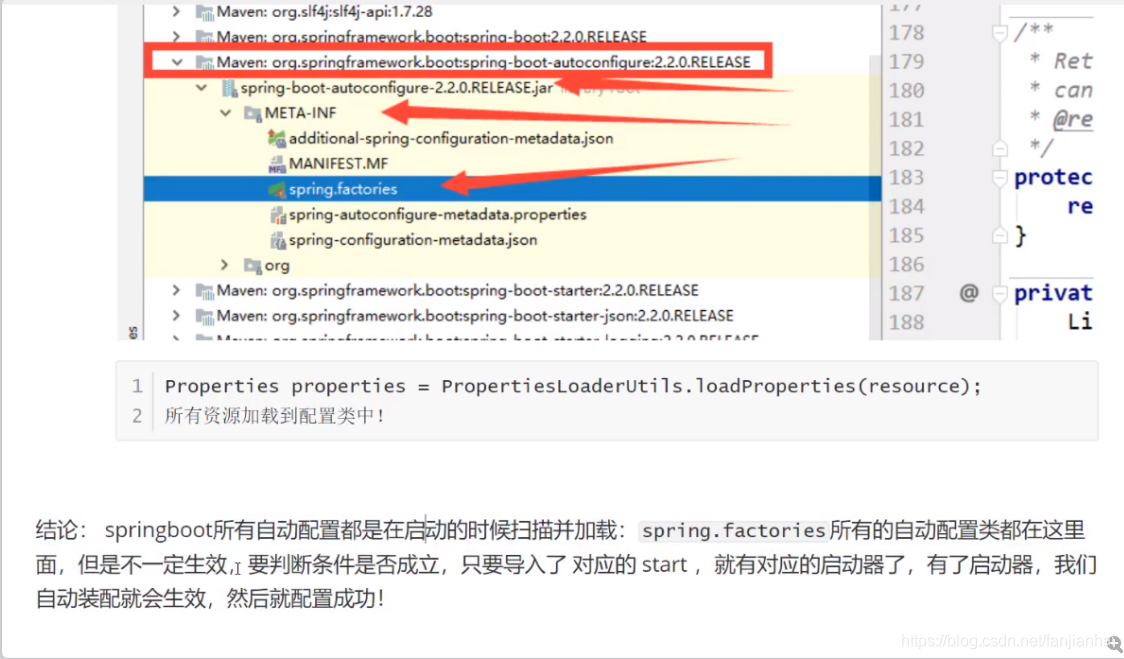
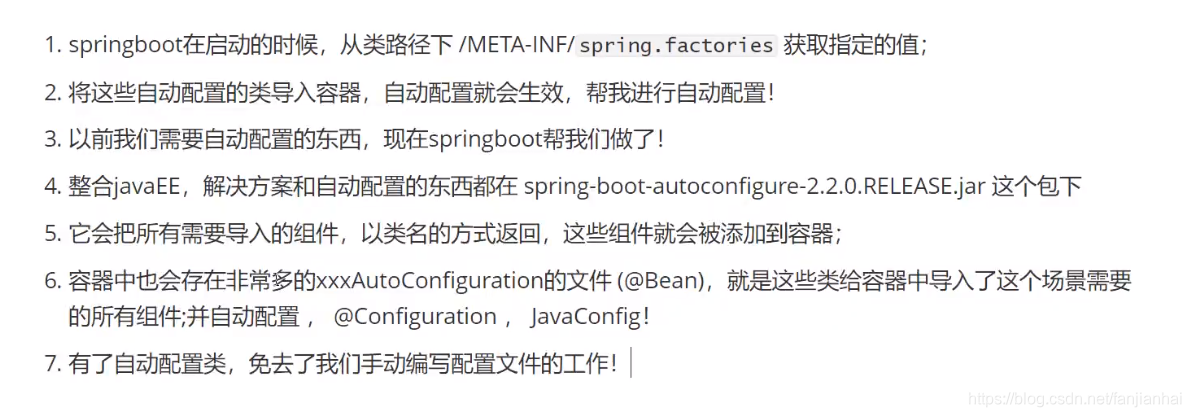
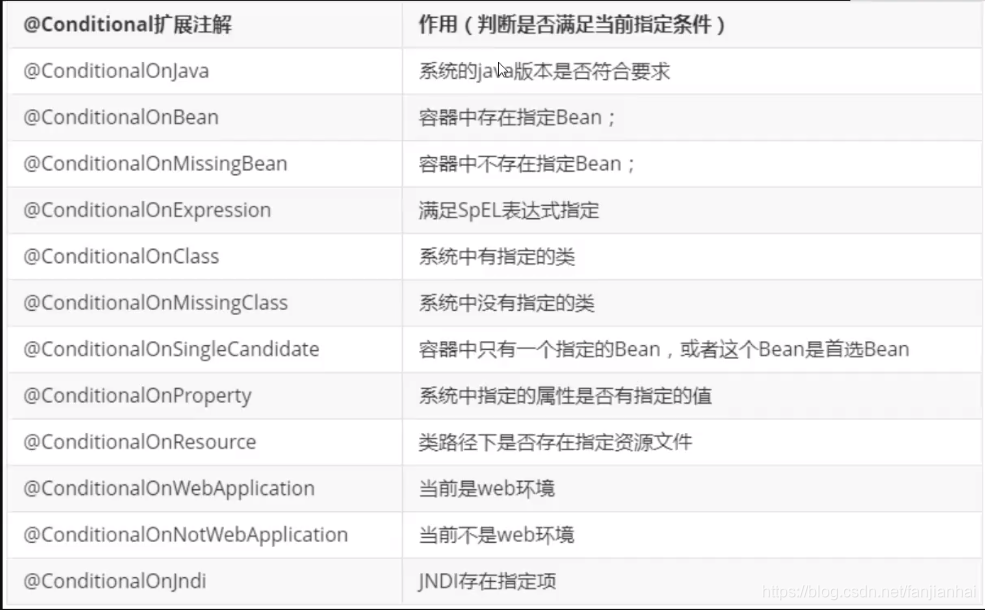
- 项目资源: classLoader.getResources(FACTORIES_RESOURCE_LOCATION) "META-INF/spring.factories"; 从这里获取配置 spring-boot-autoconfigure-2.2.0.RELEASE.jar META-INF spring.factories;所有的自动配置类都在这里了!(自动配置生效,需要导入对应的start核心注解:@ConditionalOnXXX, 如果这里的条件都满足,才生效!)系统资源:classLoader.getSystemResources(FACTORIES_RESOURCE_LOCATION)
- 从这些资源中遍历了所有的nextElement(自动配置),遍历完成之后,封装成Properties供我们使用@ComponentScan 扫描当前主启动类同级的包
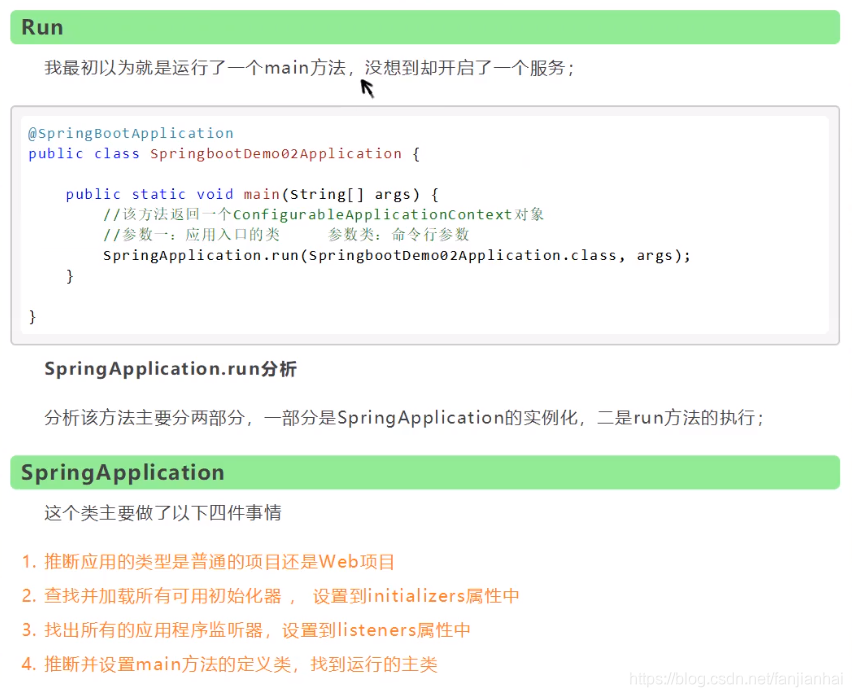
5.2. SpringApplication 启动 run
5.3. 自动配置原理再理解
6. yaml讲解
1 | # k = v |
- yaml
1 | package com.xiaofan.pojo; |
1 | <!-- 解决有红色提示问题 --> |
1 | person: |
- properties
1 | # 加载指定的配置文件 |
6.1. yaml 和properties的对比
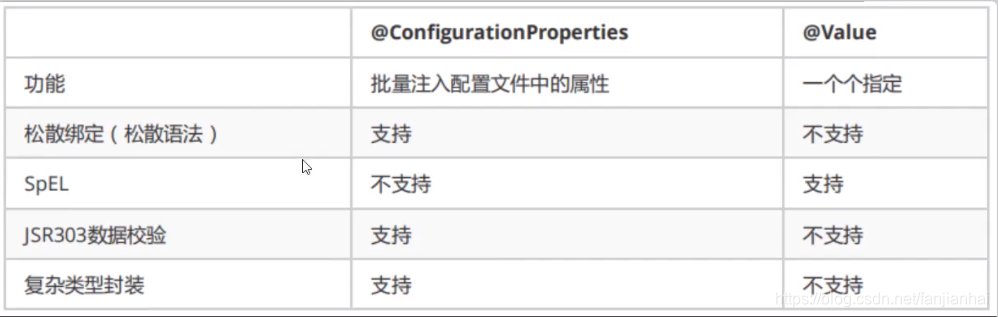
松散绑定
1
2
3
4
public class Person {
private String lastName;
1 | person: |
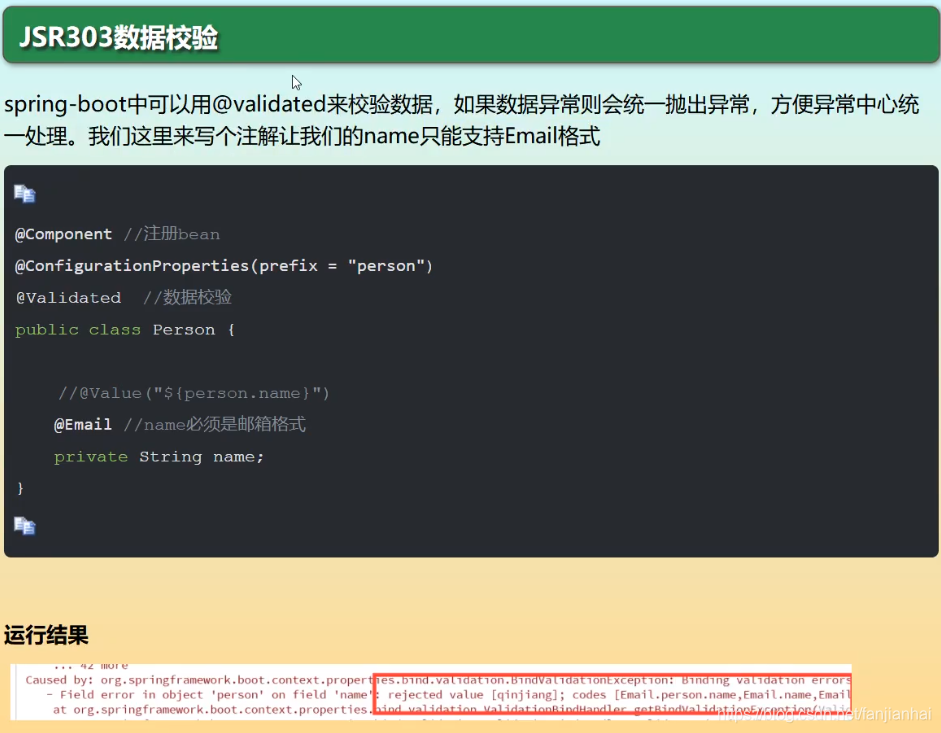
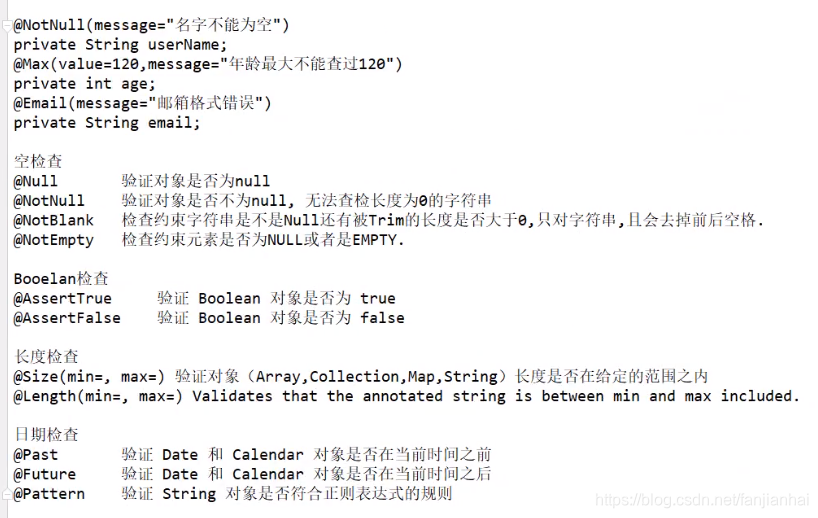
- JSR303 数据校验
1 | <dependency> |
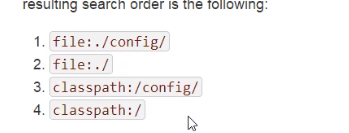
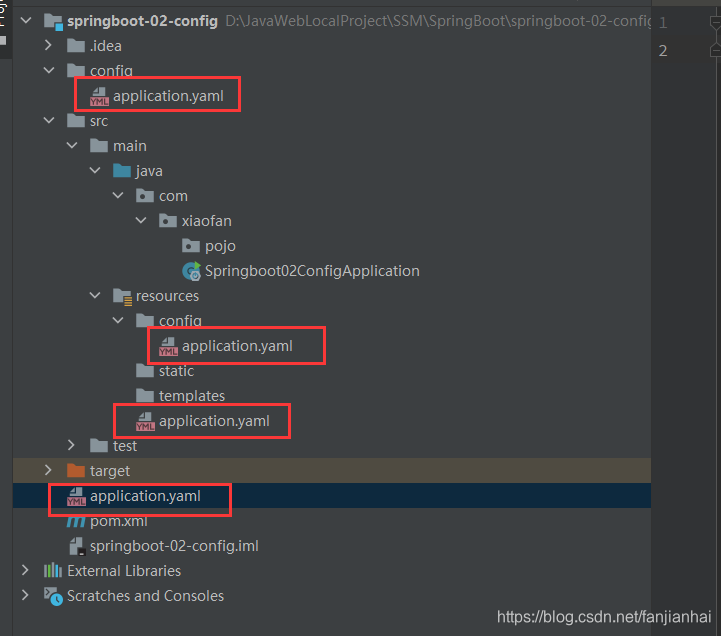
7. 多环境配置及配置文件的位置
- 配置文件的位置
- 多环境
1 | spring: |
9 Web开发探索
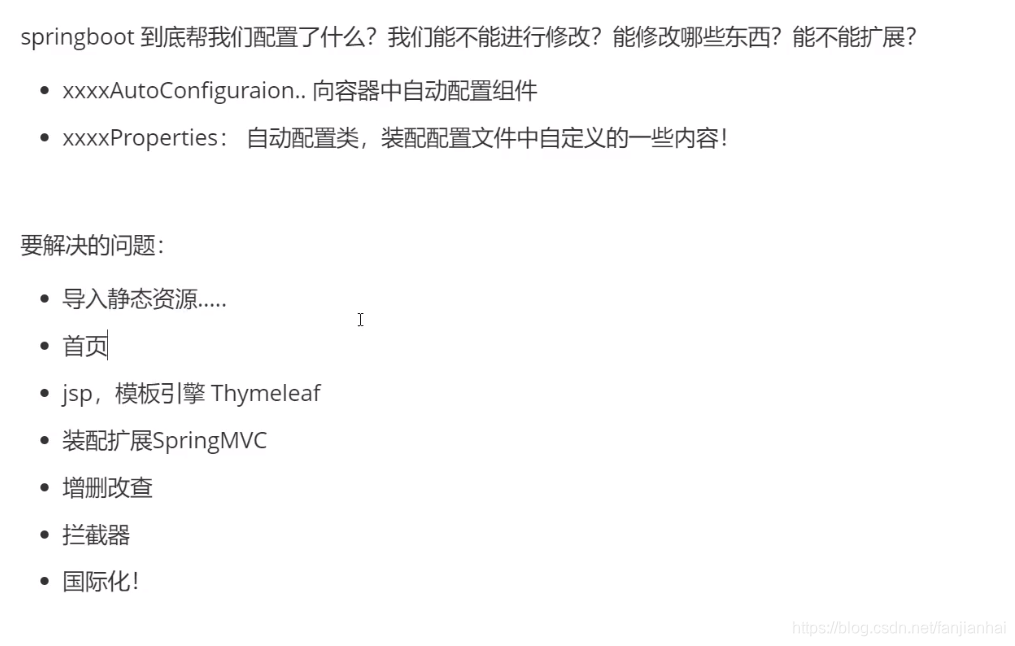
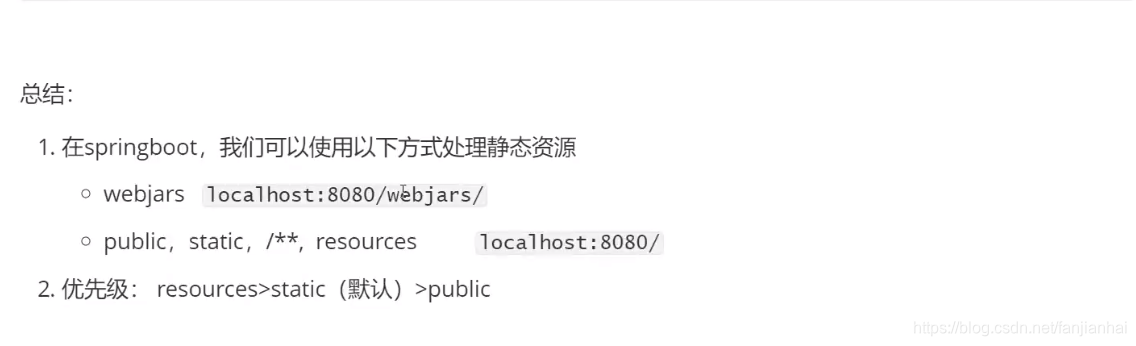
9.1. 静态资源导入
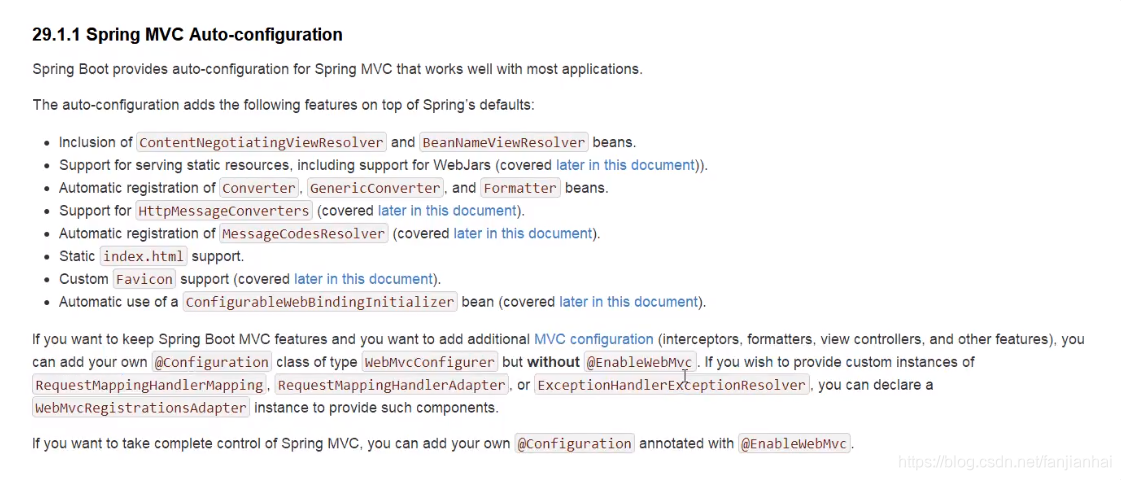
WebMvcAutoConfiguration
内部类:EnableWebMvcConfiguration (WebProperties)
1 | public void addResourceHandlers(ResourceHandlerRegistry registry) { |
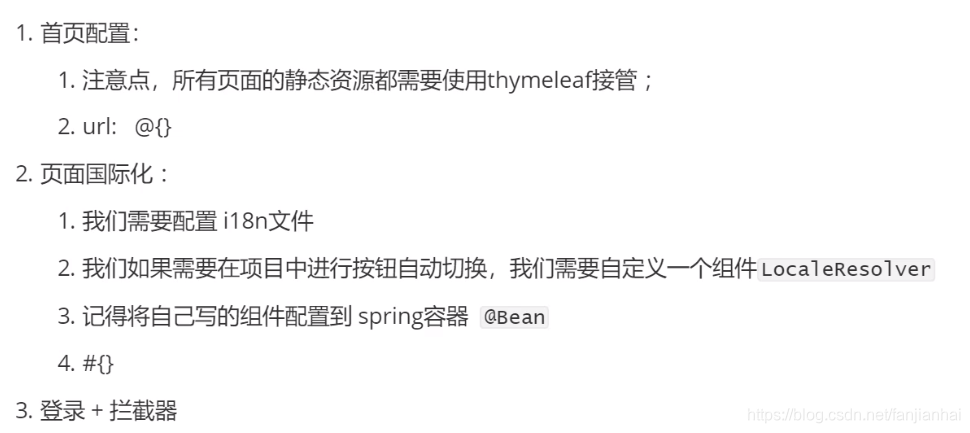
9.2. 首页
直接把首页放入到static目录即可!
9.3. Thymeleaf模板引擎
Github: https://github.com/thymeleaf
导入starter
1 | <dependency> |
1 |
|
1 | package com.xiaofan.controller; |
9.4. MVC配置原理
1 | package com.xiaofan.config; |
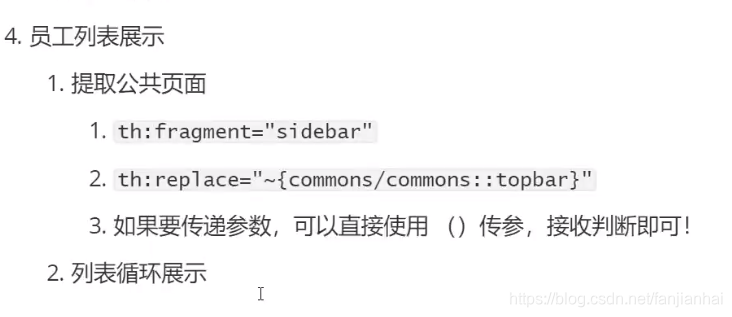
10. 员工管理系统springboot-04-system
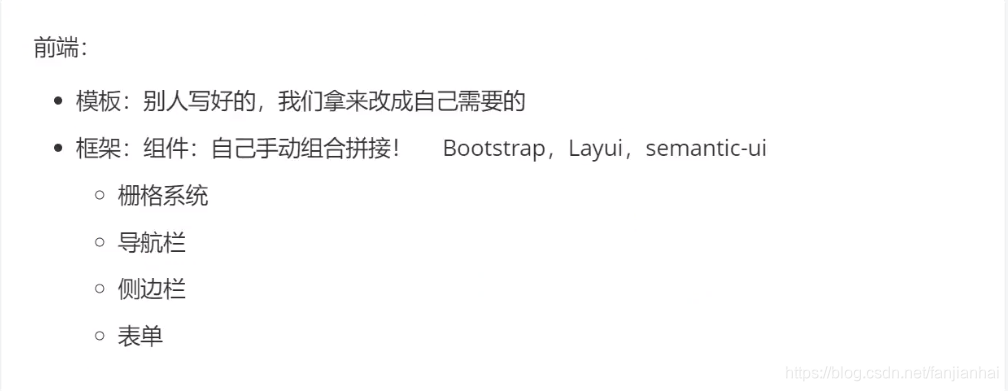
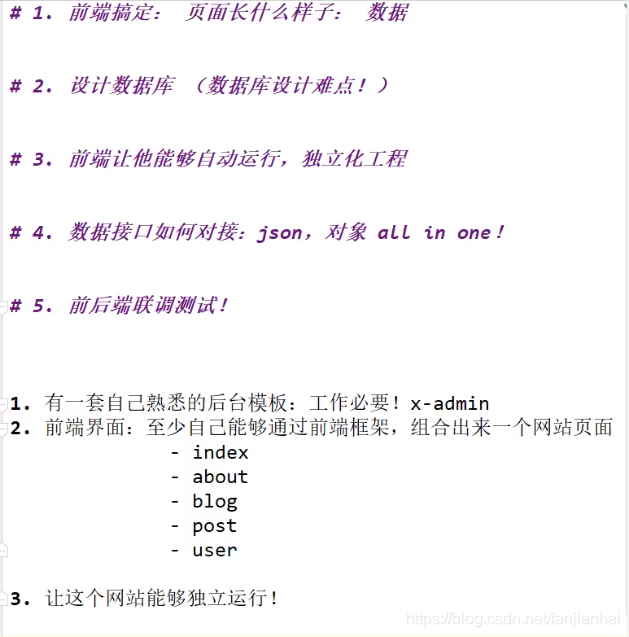
11. 如何写一个网站
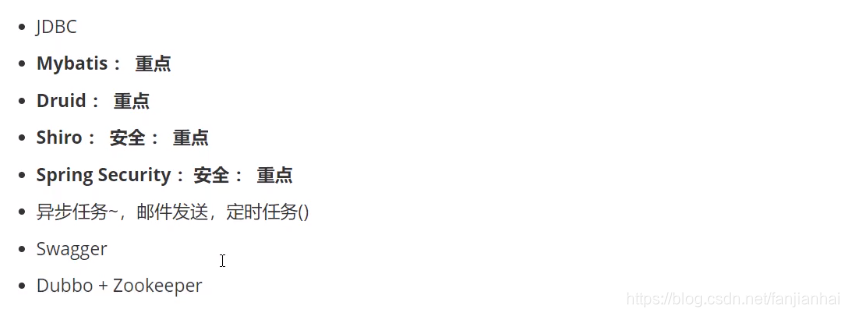
12. Spring Data
- JDBC
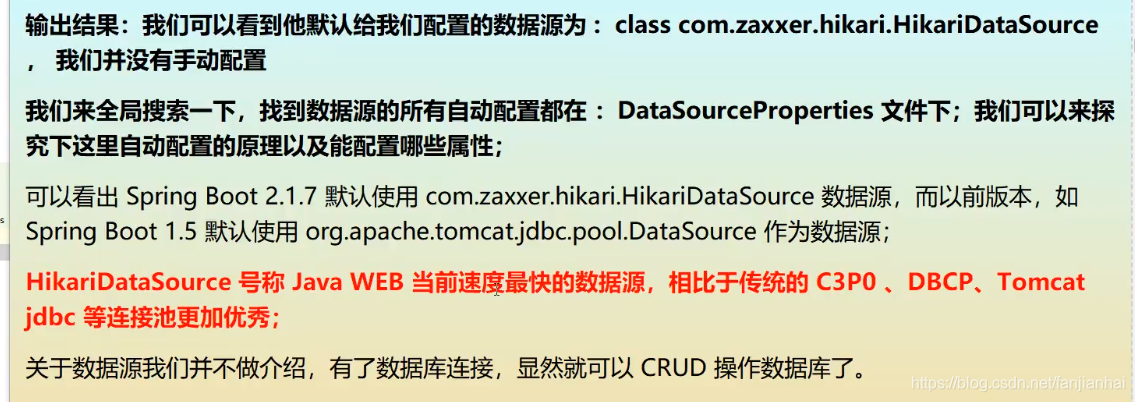
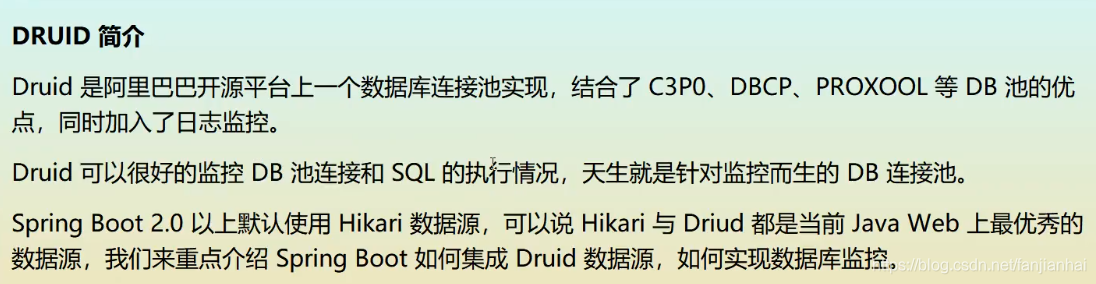
- Druid
1 | spring: |
1 | package com.xiaofan.config; |
13. 整合mybaits框架
- pom.xml
1 | <!--mybatis 自研--> |
- UserMapper.xml
1 |
|
- Springboot整合mybatis
1 | # 整合mybatis |
- 编写controller进行测试
1 | package com.xiaofan.controller; |
14. SpringSecurity

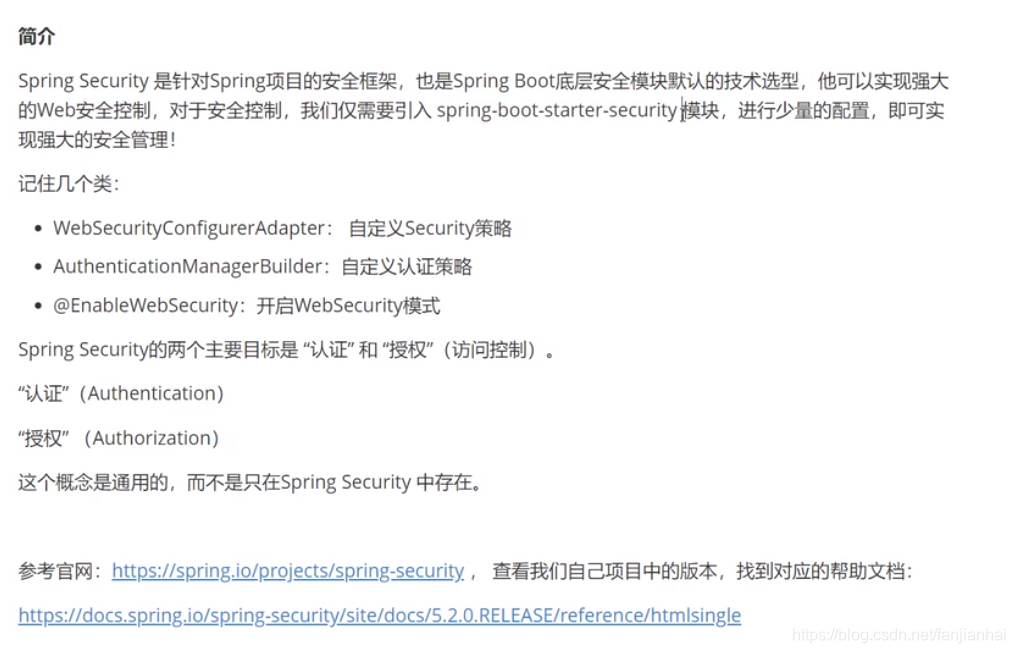
14.1. 核心点
- pom.xml
1 | <!-- 整合 springsecurity thymeleaf --> |
- SecurityConfig.java
1 | package com.xiaofan.config; |
- index.html页面重点
1 | <html lang="en" xmlns:th="http://www.thymeleaf.org" xmlns:sec="http://www.thymeleaf.org/thymeleaf-extras-springsecurity5"> |
1 | <div sec:authorize="!isAuthenticated()"> |
1 | package com.xiaofan.controller; |
15. Shiro
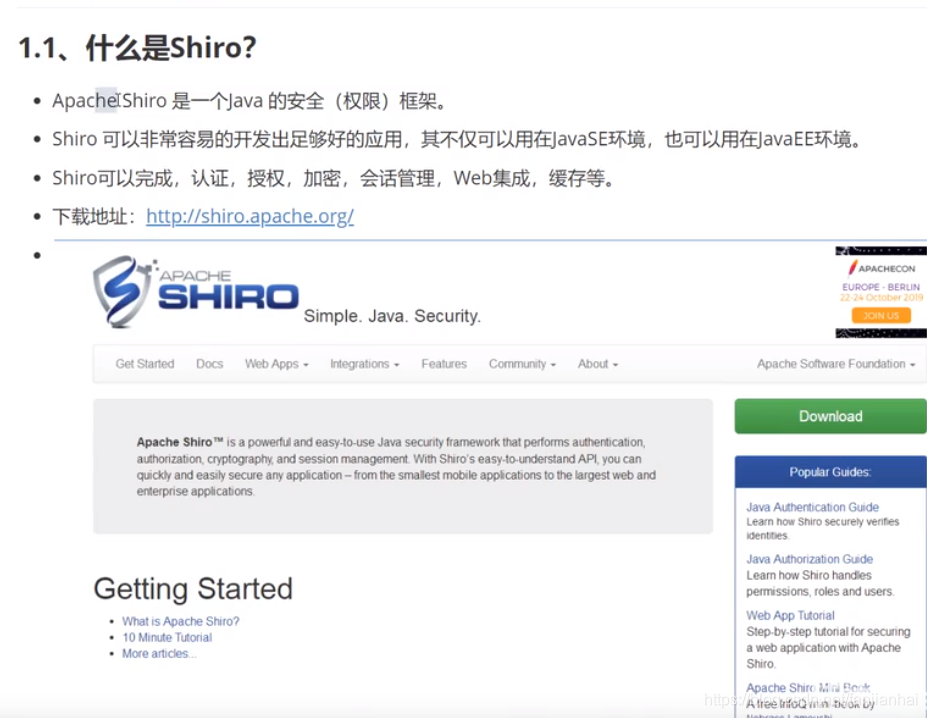
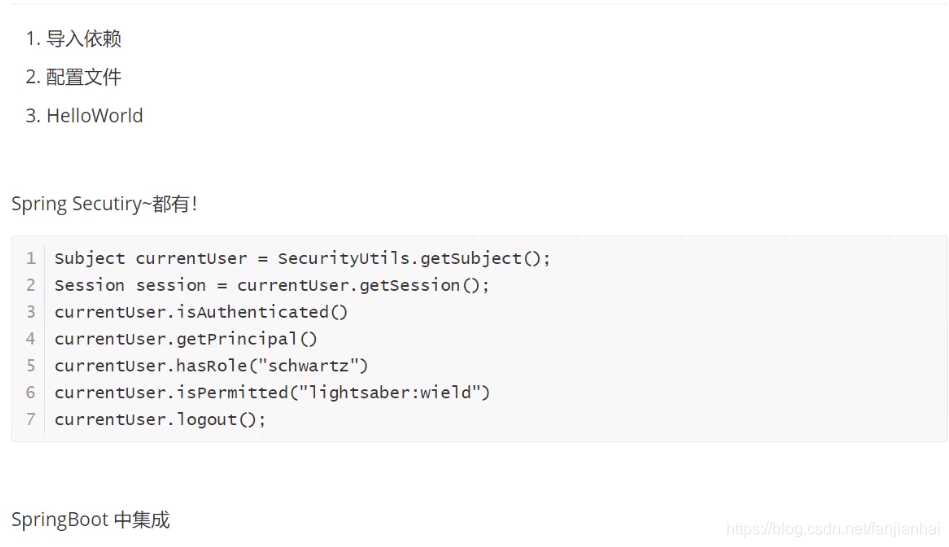
- 三大对象
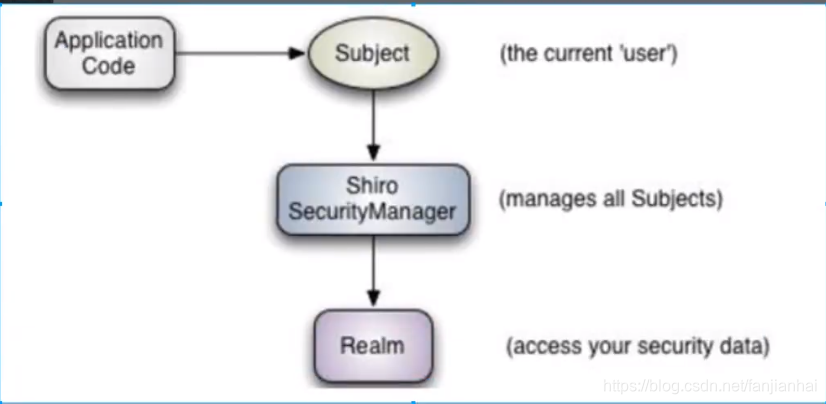
- Subject: 用户
- SecurityManager: 管理所有用户
- Realm: 连接数据
springboot-08-shiro下面包含了多个module
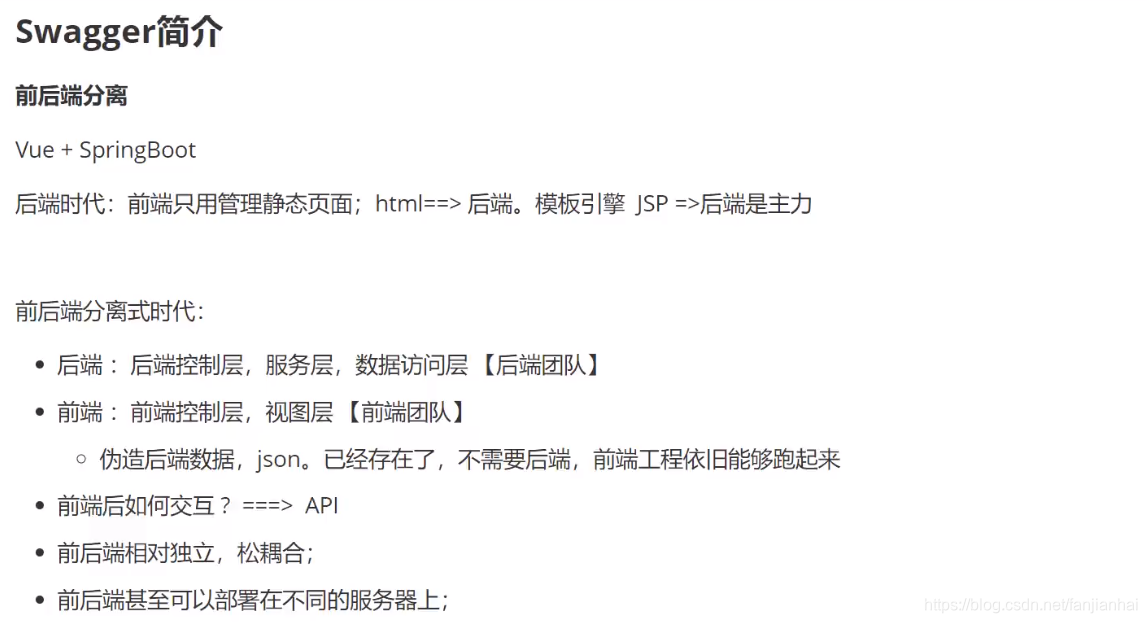
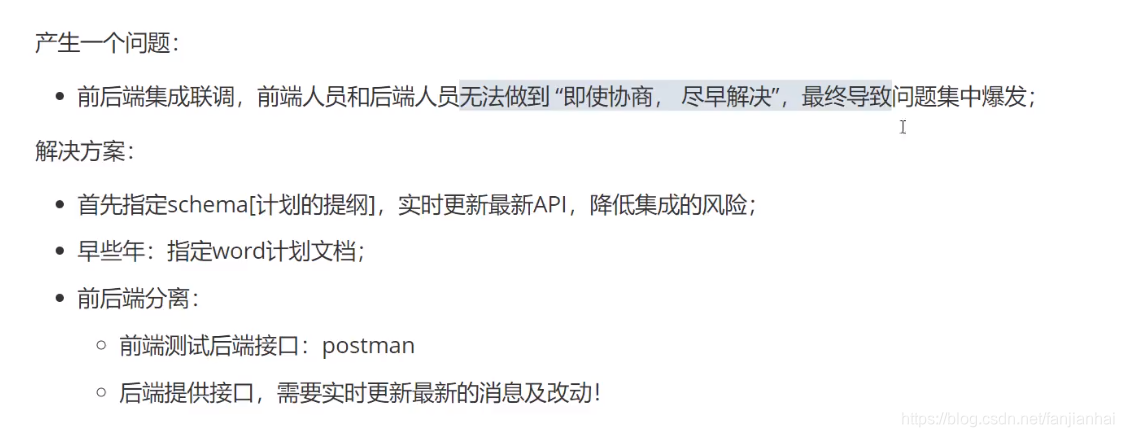
16. Swagger
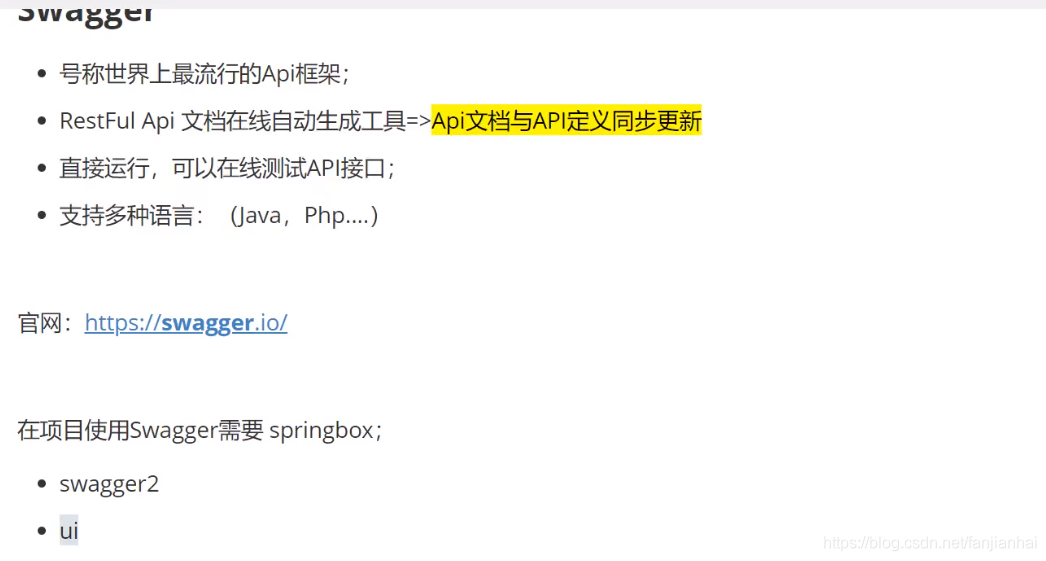
16.1. springboot集成swagger
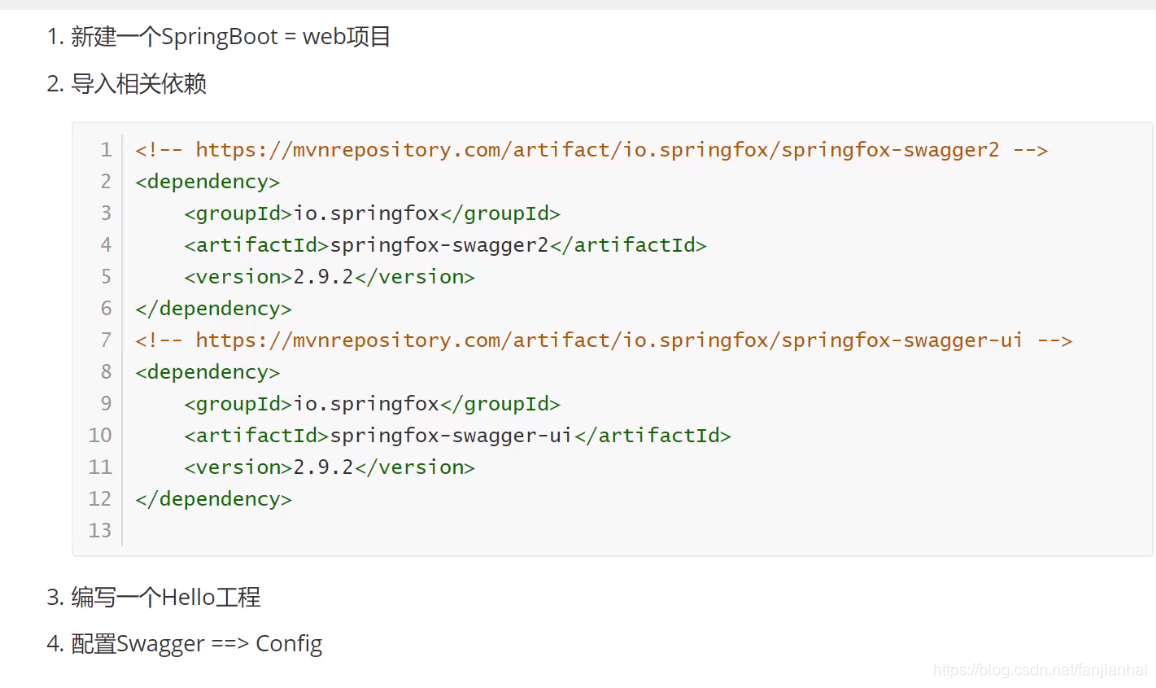
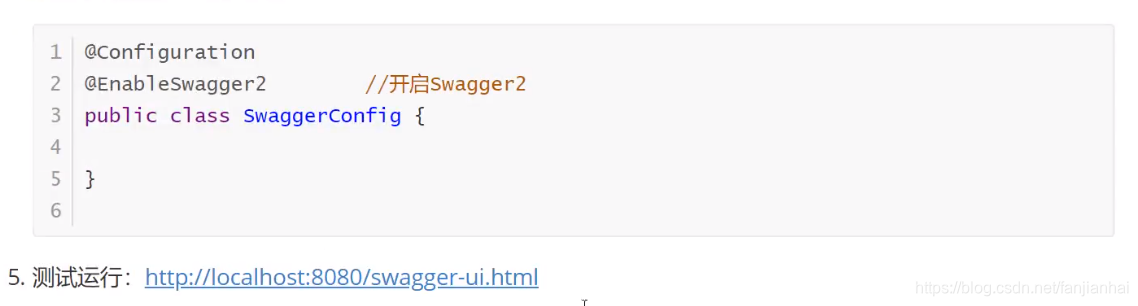
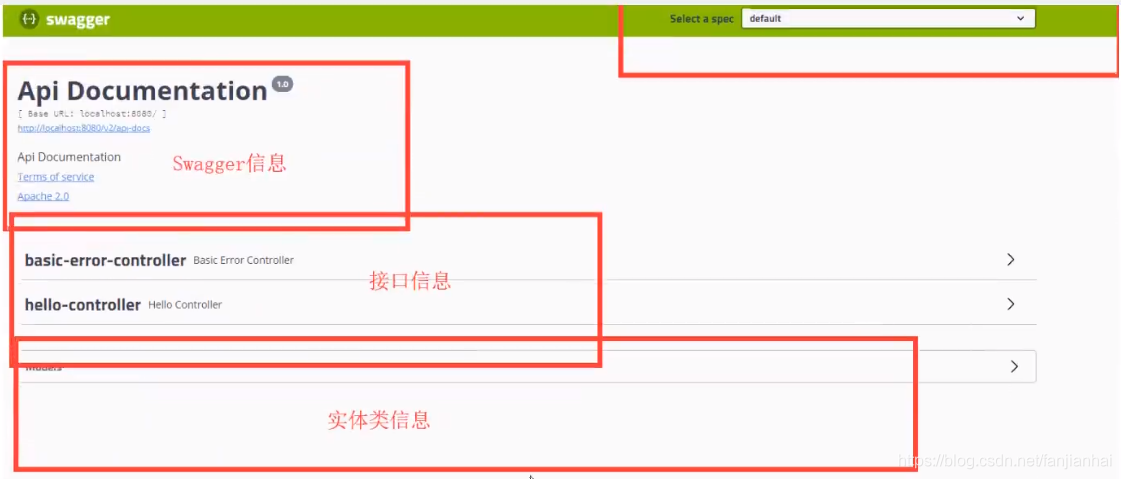
16.2. 配置Swagger
16.3. 配置Swagger接口扫描及开关
16.4. 配置多个分组
- application.yaml
1 | spring: |
- SwaggerConfig.java
1 | package com.xiaofan.config; |
- HelloController.java
1 | package com.xiaofan.controller; |
16.5. swagger2常用注解说明
常用注解:
- **@Api()**用于类;
表示标识这个类是swagger的资源
- **@ApiOperation()**用于方法;
表示一个http请求的操作
- **@ApiParam()**用于方法,参数,字段说明;
表示对参数的添加元数据(说明或是否必填等)
- **@ApiModel()**用于类
表示对类进行说明,用于参数用实体类接收
- **@ApiModelProperty()**用于方法,字段
表示对model属性的说明或者数据操作更改
- **@ApiIgnore()**用于类,方法,方法参数
表示这个方法或者类被忽略
- @ApiImplicitParam() 用于方法
表示单独的请求参数
- @ApiImplicitParams() 用于方法,包含多个 @ApiImplicitParam
16.6. 总结

17. 任务
17.1. 异步任务
- ```java
@EnableAsync
@SpringBootApplication
public class Springboot10TaskApplication {1
2
3
4
5
6
7
8
9
10
11
12
```java
@Async // 告诉spring这是一个异步方法
public String hello() {
    try {
        Thread.sleep(3000);
    } catch (InterruptedException e) {
        e.printStackTrace();
    }
    System.out.println("执行完毕...");
    return "hello async";
}
17.2. 邮件任务以qq邮箱为例
- maven坐标
1 | <!--底层导入的本质还是javax.mail 配置--> |
- yaml配置
1 | spring: |
- 测试类
1 | package com.xiaofan; |
17.3. 定时执行任务
- 任务调度者:TaskScheduler
- 任务执行者:TaskExecutor
- 开启定时注解的功能:@EnableScheduling
1 | package com.xiaofan.service; |
18.SpringBoot整合redis
https://github.com/fanjianhai/kuangshen/tree/master/7.redis%E5%AD%A6%E4%B9%A0%E7%AC%94%E8%AE%B0
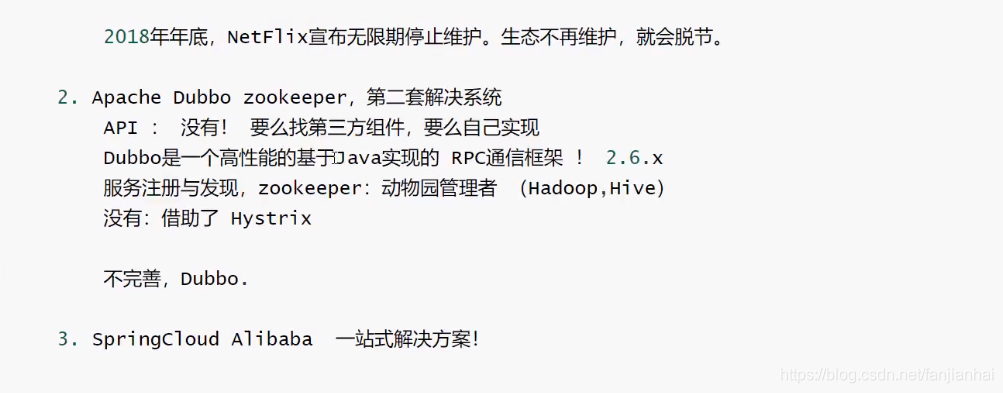
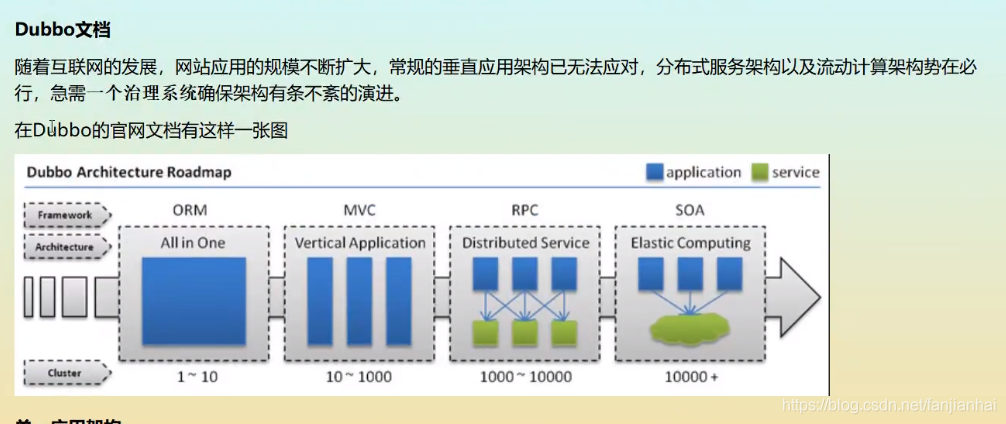
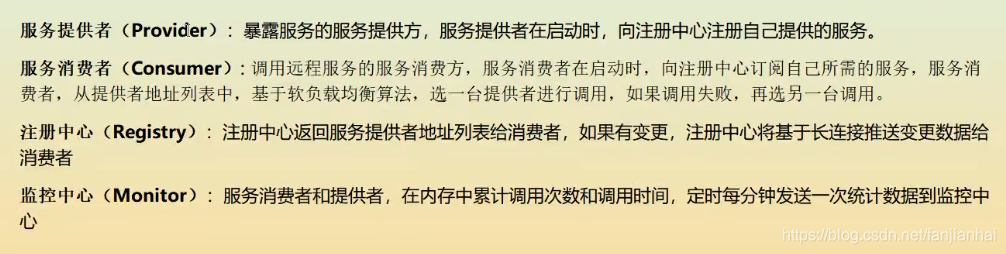
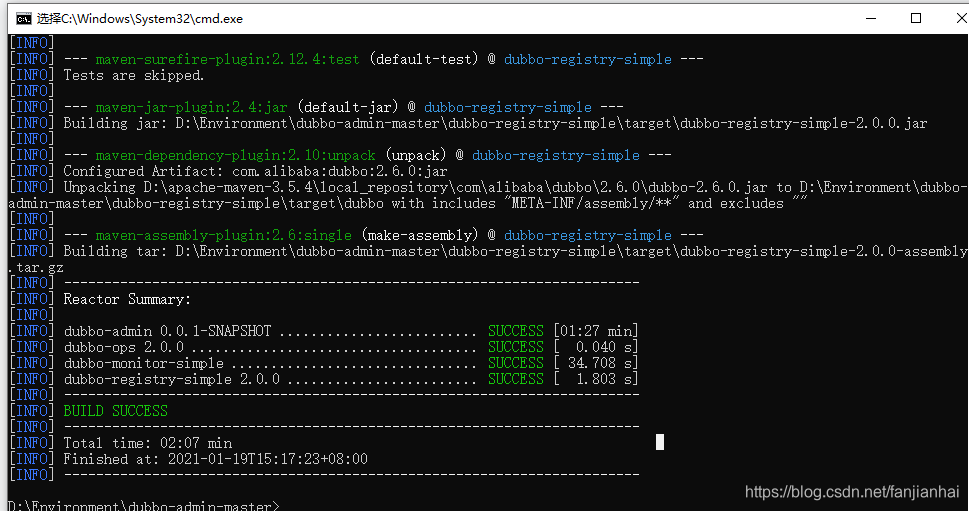
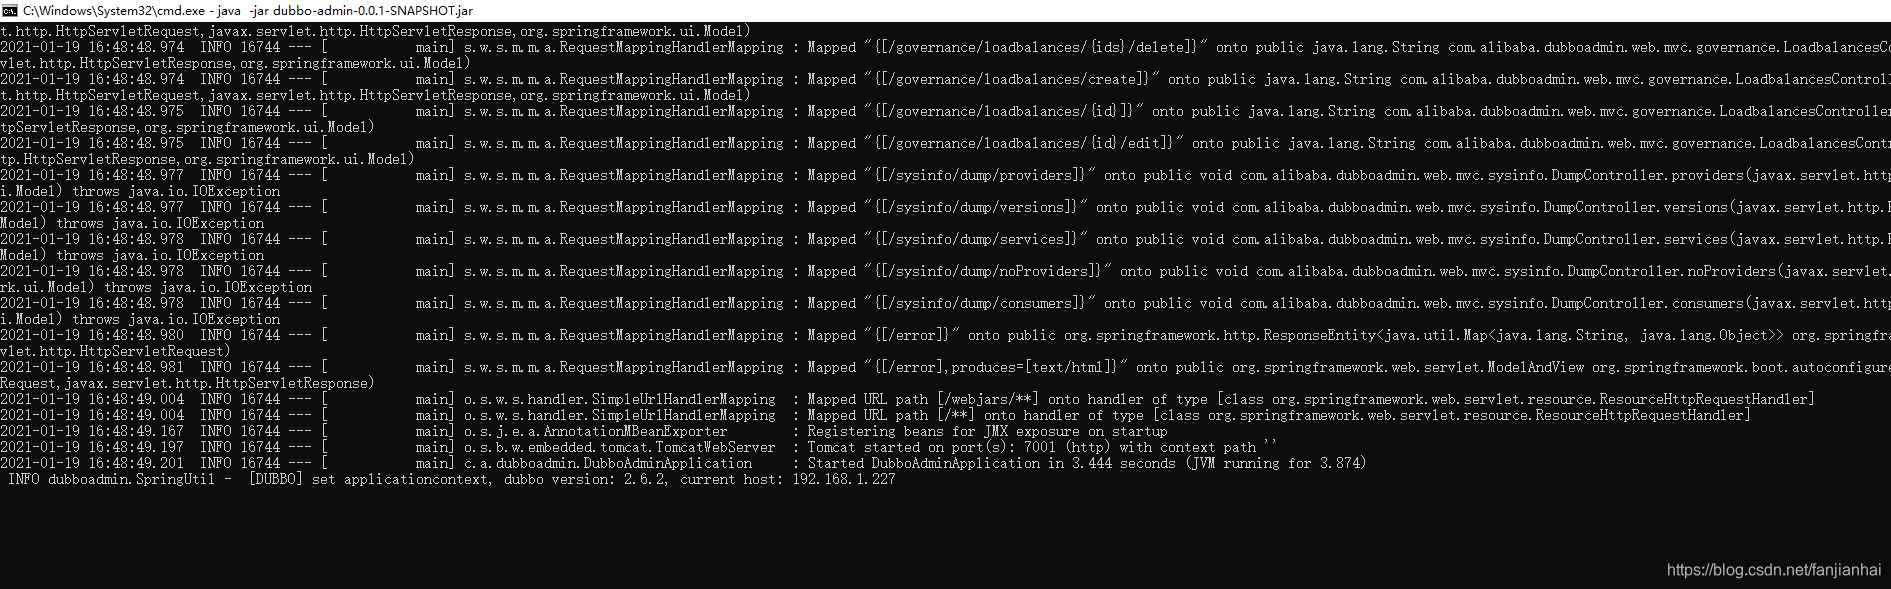
19. 分布式 Dubbo + Zookeeper
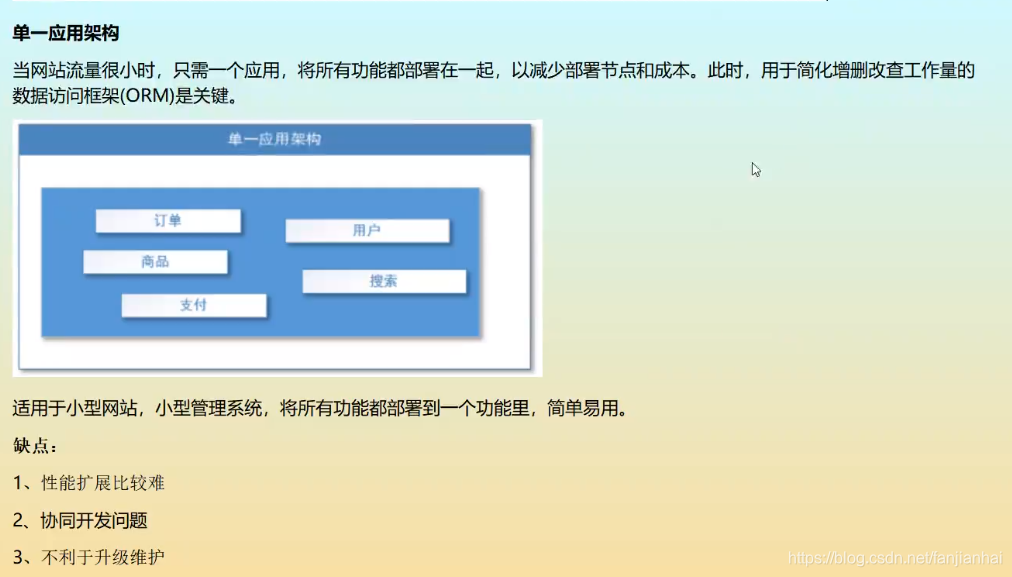
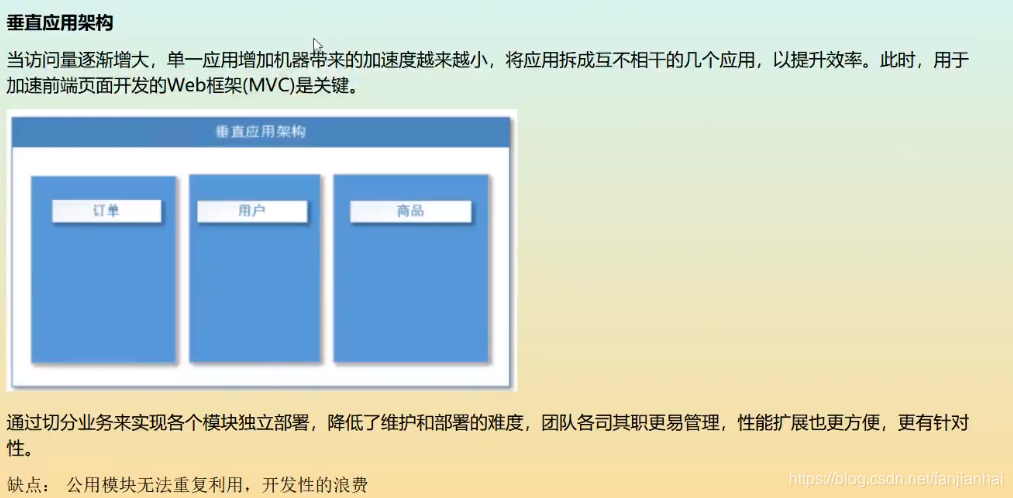
19.1. 分布式
19.2. RPC

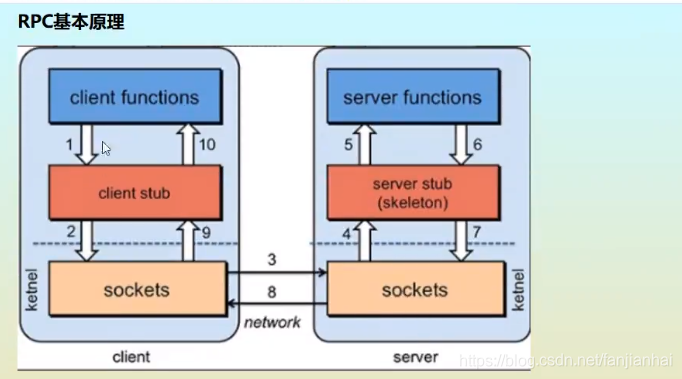
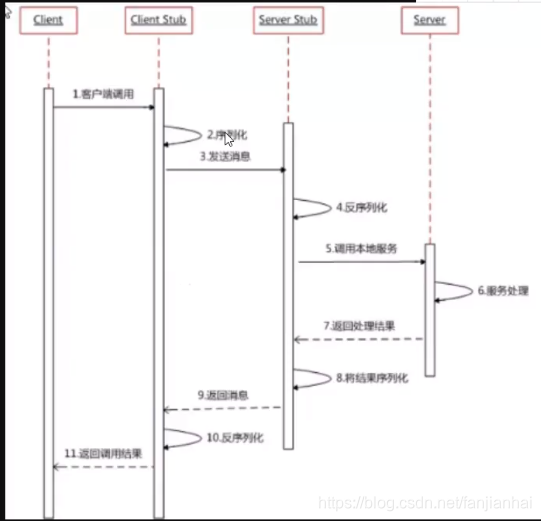
RPC两个核心模块:通讯,序列化

19.3. Dubbo

- 安装zookeeper(3.4.3)
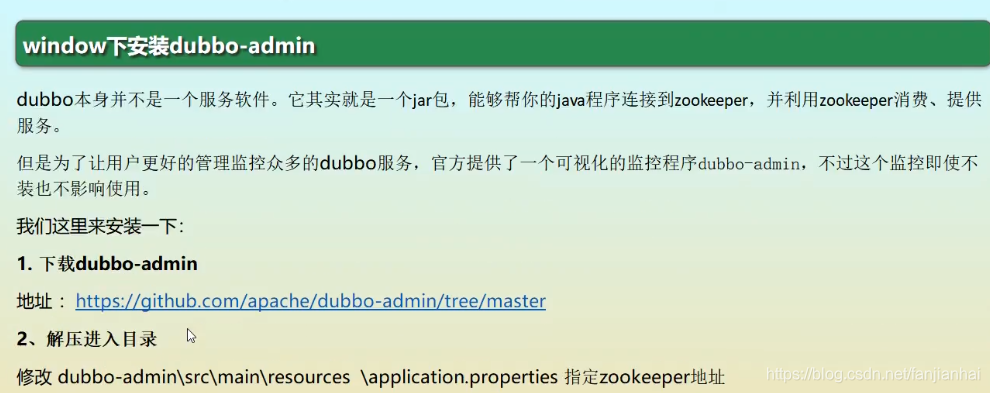
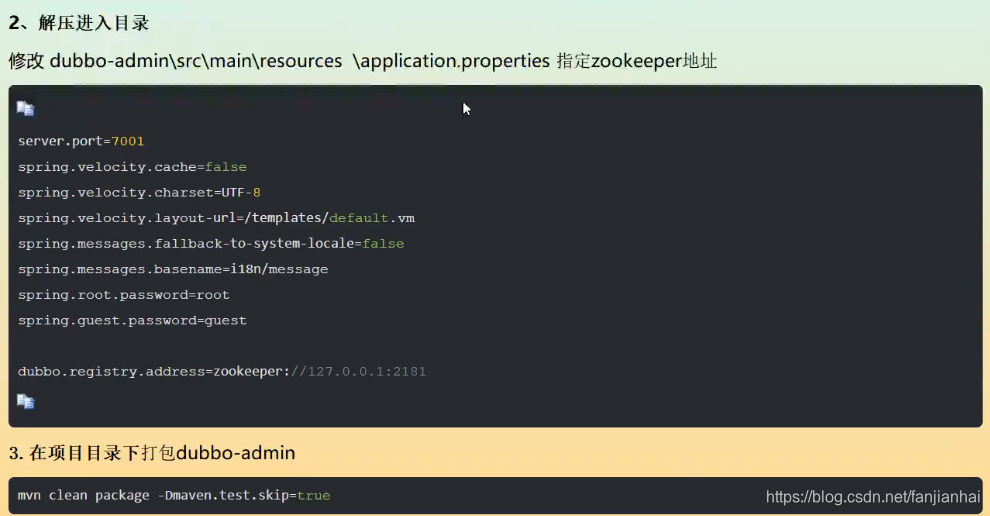
- 安装Dubbo
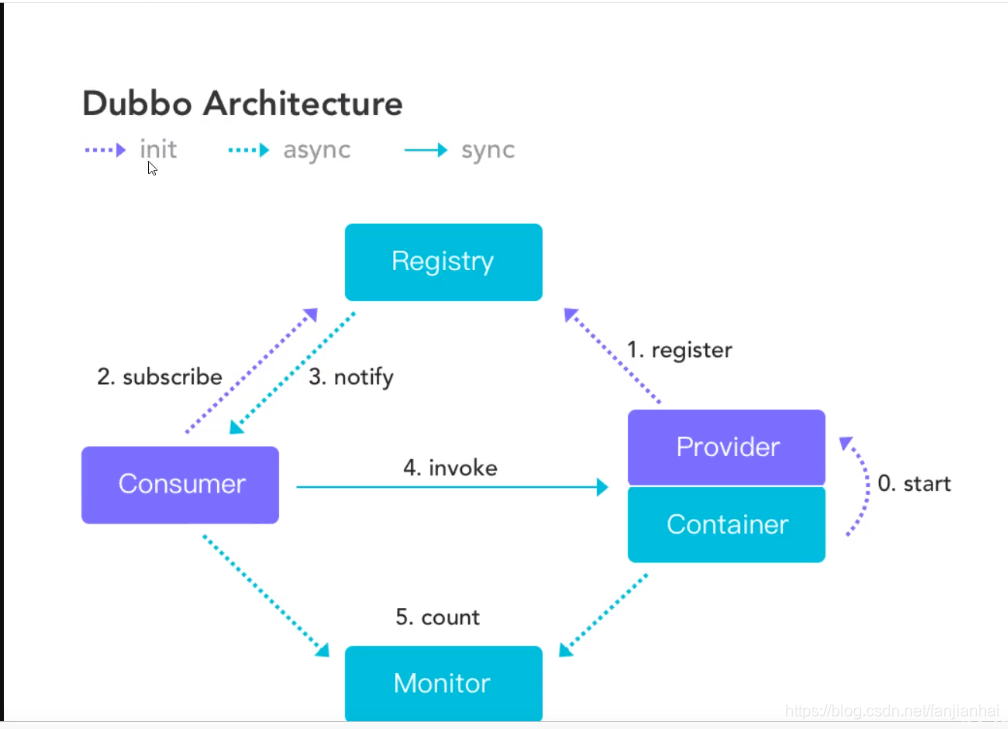
19.4. 服务发现
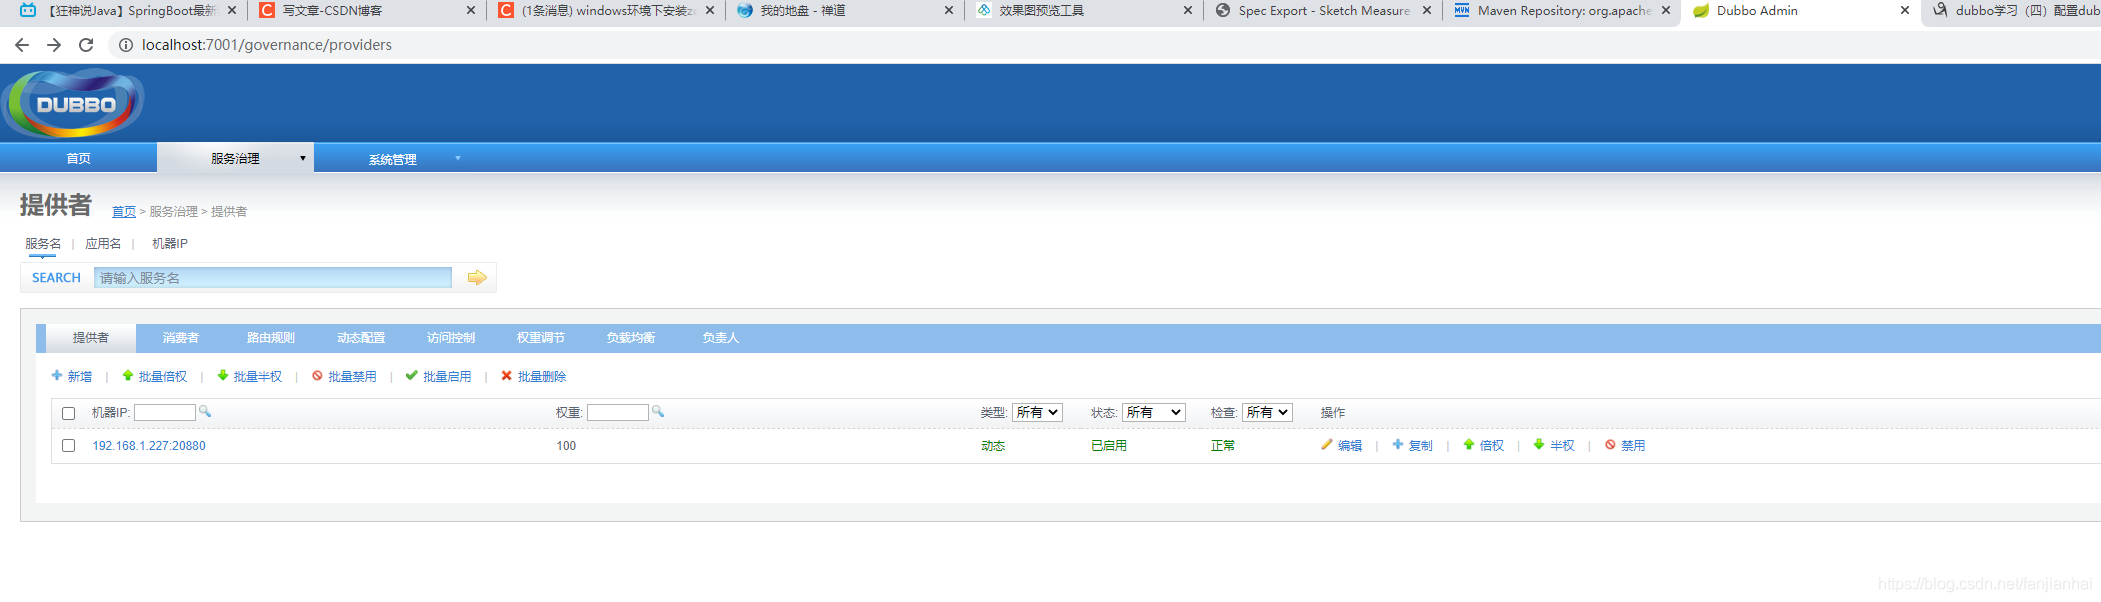
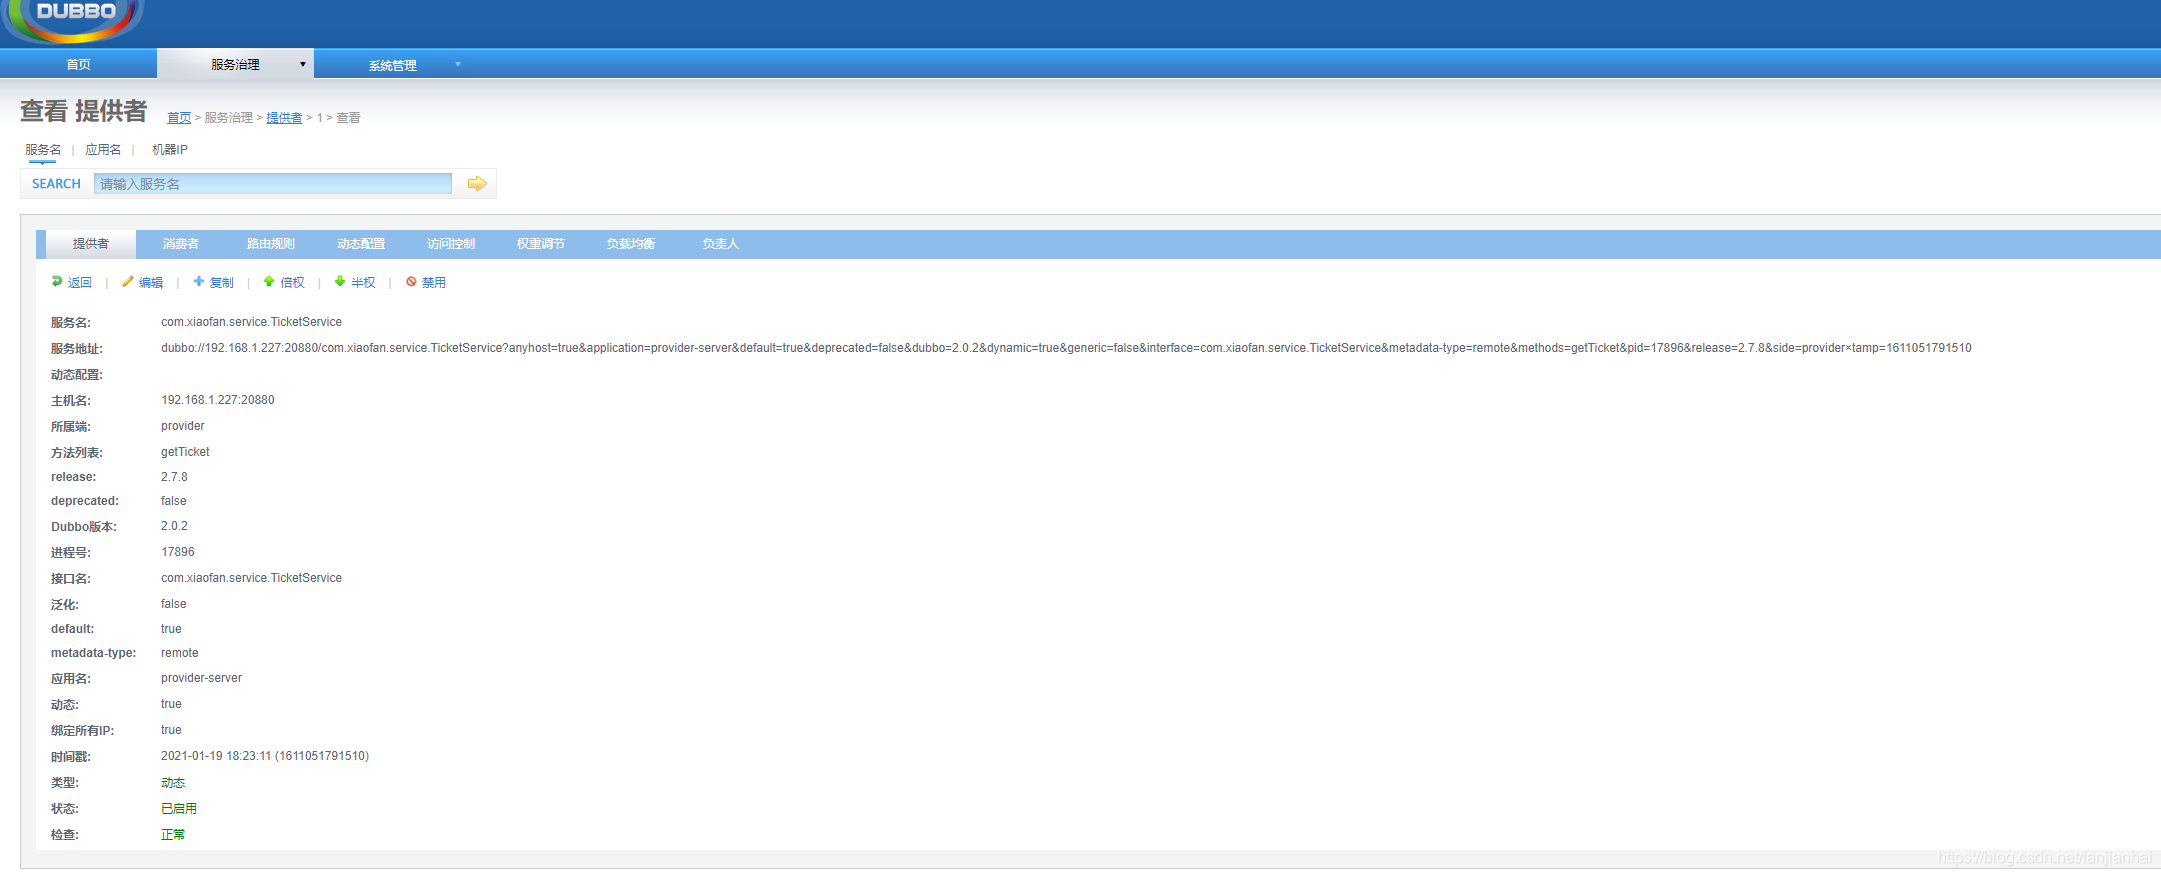
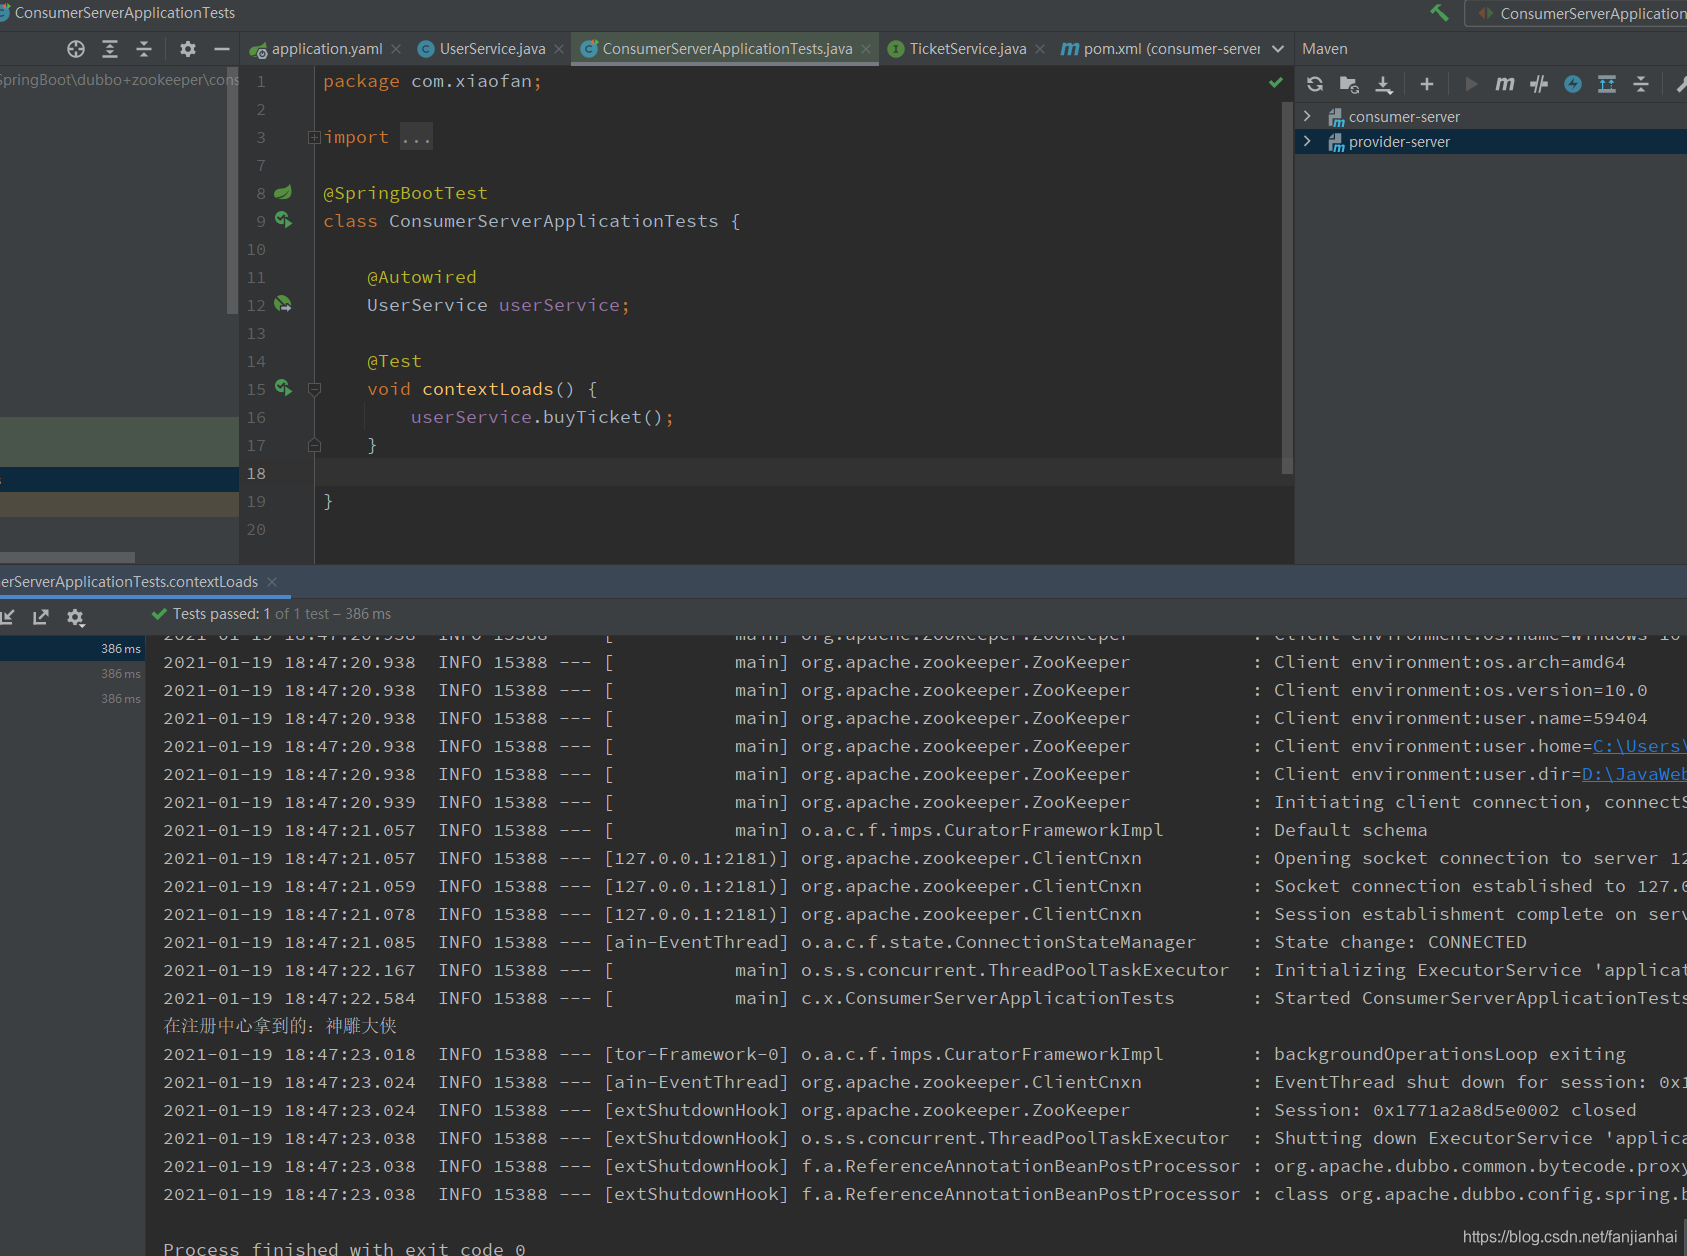
Dubbo + Zookeeper 还得深入研究,这里只是简单的测试!
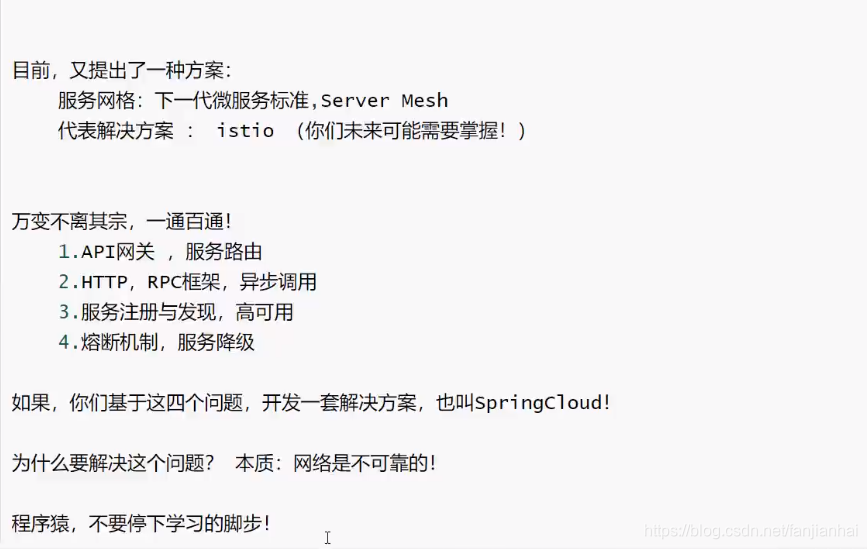
19.5. Dubbo+Zookeeper vs Spring Cloud 之间的比较
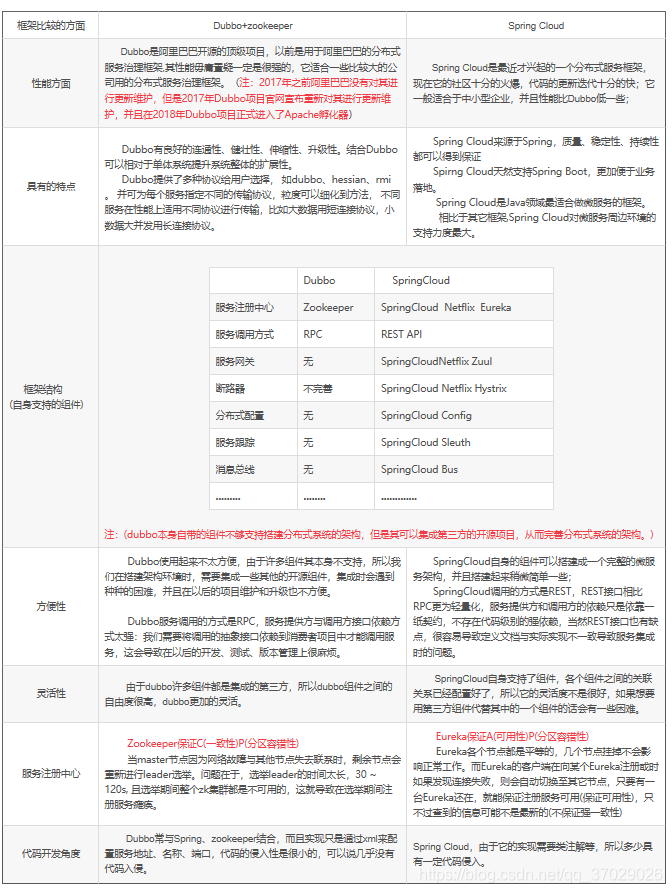
总的来说这两个搭建分布式系统的框架各有各的好处,在选择时要根据自己的需求等情况综合做选择;
但是Eureka作为单纯的服务注册中心来说感觉要比Zookeeper更加“专业”,因为注册服务更重要的是高可用性,可以接受短期内,达不到一致性的状况
20.回顾